12. Settings Lock
12.1. Introduction
Settings lock allows installers to lock critical settings, preventing accidental or unintended changes to a system’s operating parameters. It enhances system stability and is invaluable for engineers managing hundreds of installations.
All other controls, such as setting low-voltage alarms, initiating battery equalization, updating firmware, and setting current limits, remain available to system owners and end users. Real-time data, historical data, and graphical analysis also remain accessible.
In emergencies, end-users can always access locked product settings by using the ‘Password lost’ function.
If anyone has removed a password, the installer or OEM will receive a notification when they reconnect to the product.
Please also watch the introductory video for this feature, and review the slide presentation here.
12.2. Features
Lock product settings in one step
Lock critical settings from end-users in one simple step. Click ‘Lock product settings’ on the product’s info tab and repeat for all products in the installation.
Built-in password manager
Inside VictronConnect, log in to VRM to store passwords automatically in your VRM account. There is no need to type the password each time, and passwords are not lost when the phone is lost.
Daily controls and firmware updates remain accessible
End-users with locked systems can still control and update their product. The critical settings are locked and become view-only for end-users.
Unlocking product settings
The product settings can be unlocked by using the password. When the password is entered, the settings will become editable on the device and/or VRM account that was used. The product remains locked for other devices.
Full settings remain accessible to the installer
Passwords are saved to the phone and the VRM account that locked the products. All settings remain editable on the device or VRM account that was used to apply the lock. For other users, the critical settings remain view-only.
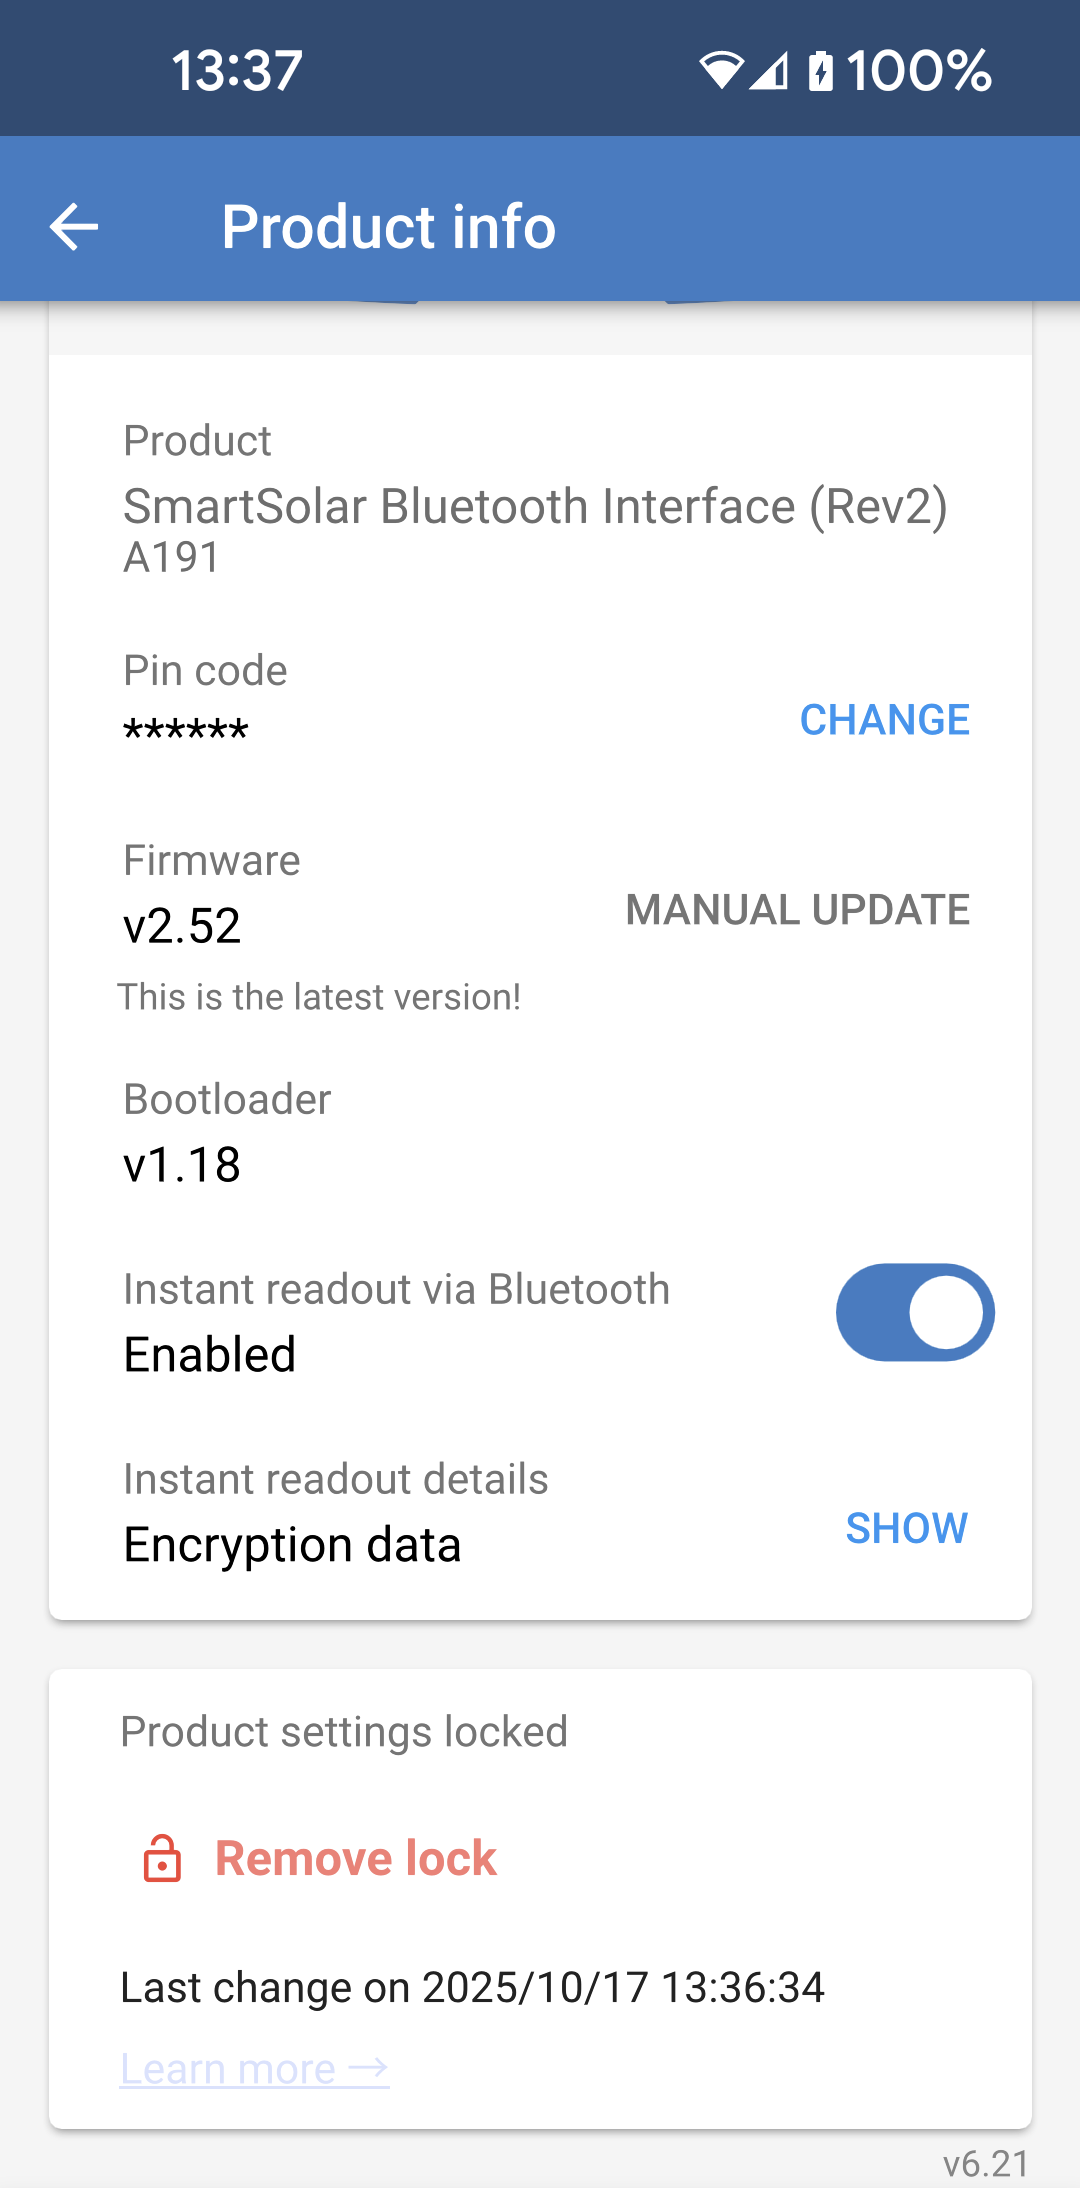
Remove settings lock
The password can be permanently removed by clicking 'Remove lock' (password needed). Alternatively, click ‘Password lost’ to remove the lock via the PUK code or a VE.Direct cable. Thus, end-users can regain control over their installation if needed. Installers will be able to see if passwords have been removed/updated.
12.3. Supported products
The following products are currently supported:
BMV-712
SmartShunts (all models)
SmartSolar MPPTs (all models)
Multi RS (all models)
MPPT RS (all models)
Please note that the firmware of these products will most likely require an update. To do this, use the VictronConnect app v6.00.
Products that will get Settings Lock support soon are:
Orion XS
Smart Inverters
VE.Direct Smart Dongle
12.4. Instructions and explanation
12.4.1. Explanation about Locking versus Unlocking versus Removing
Locking product settings
Adds the lock to the product.
Unlock product settings
After entering the password, the settings can now be edited. But the lock remains in place → settings remain protected.
A lock icon in VictronConnect indicates that the settings are protected. A closed lock means that you have no access, while an open lock means that the settings are protected and that you have access.
Removing the settings lock
After removing the settings lock, the settings are accessible again. Lock items are removed.
12.4.2. How to lock
Before you start, make sure the VictronConnect app and product firmware are up to date.
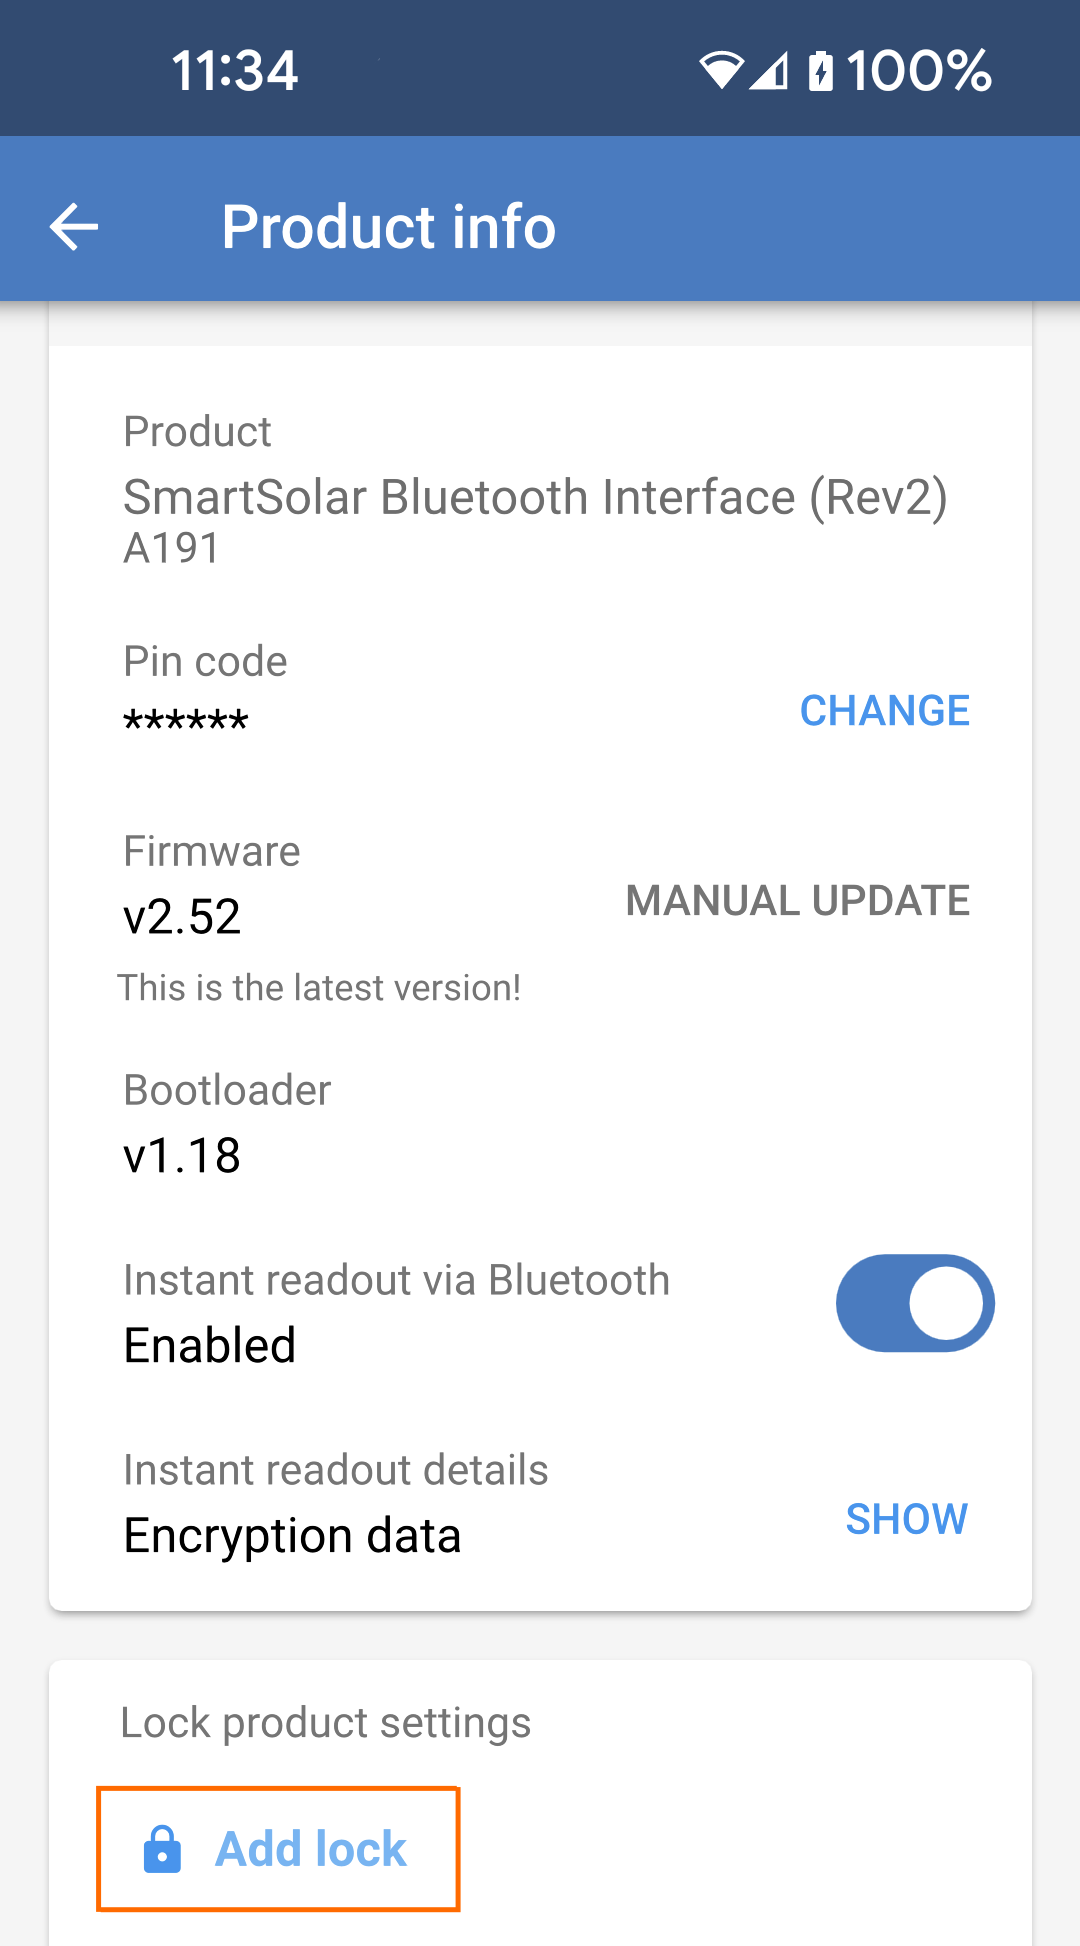
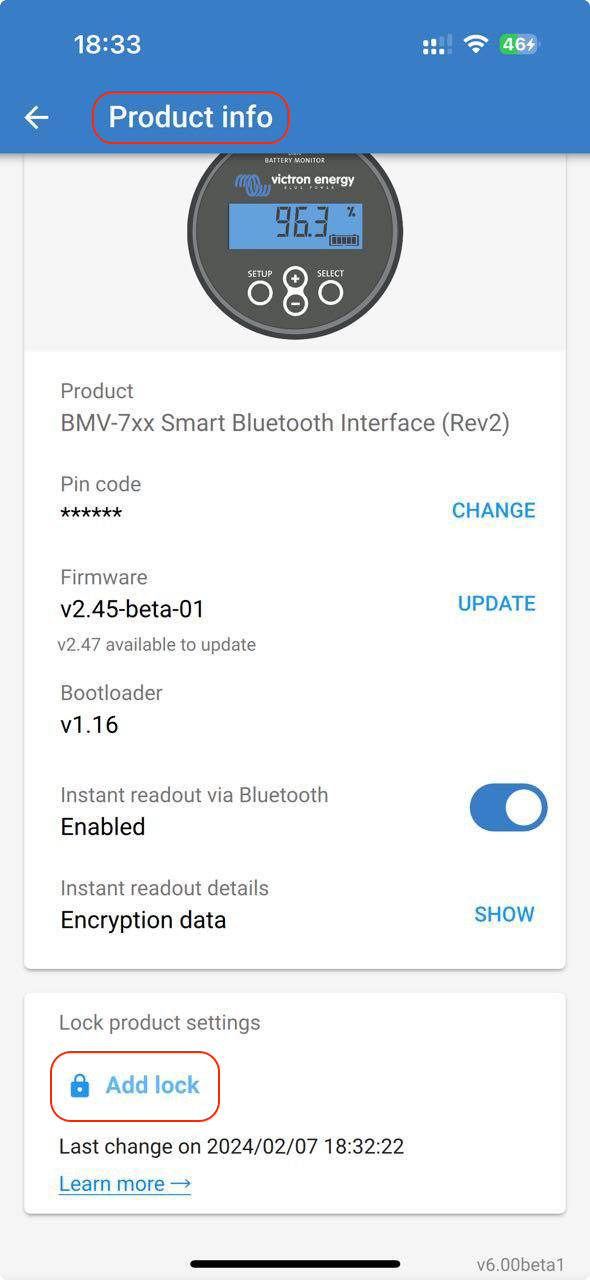
The product lock feature can be found on the "Product info" page.
|
|
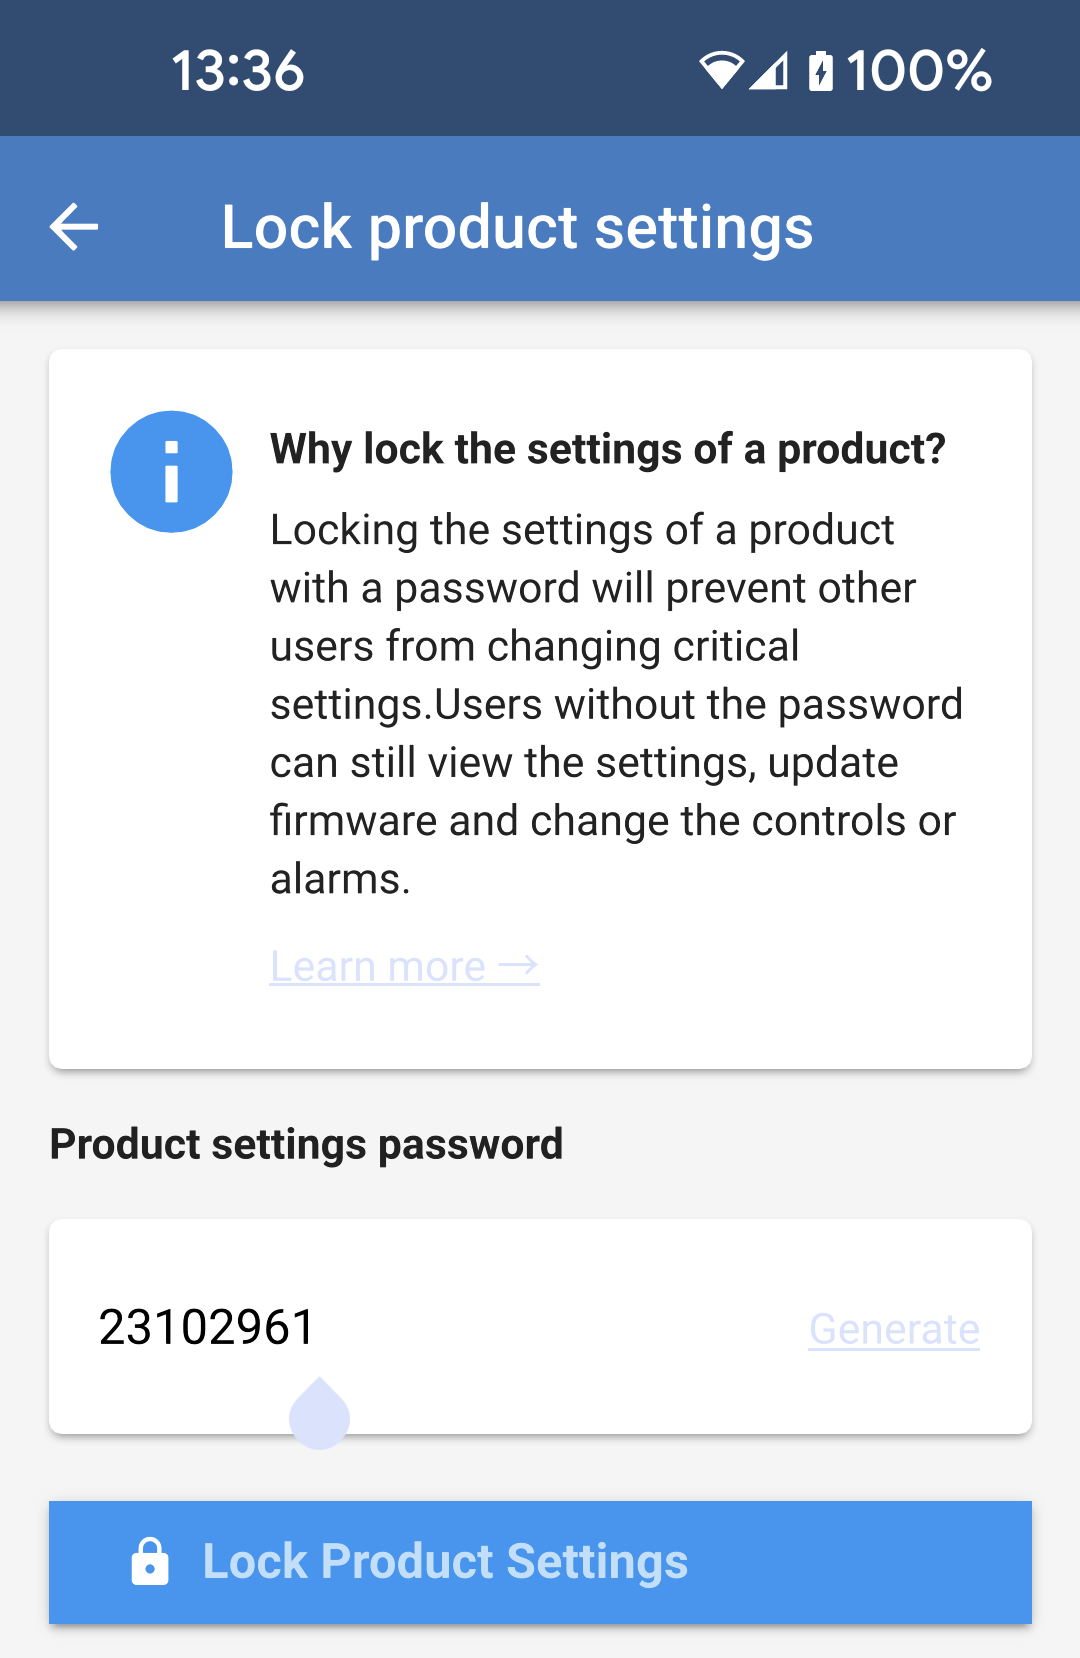
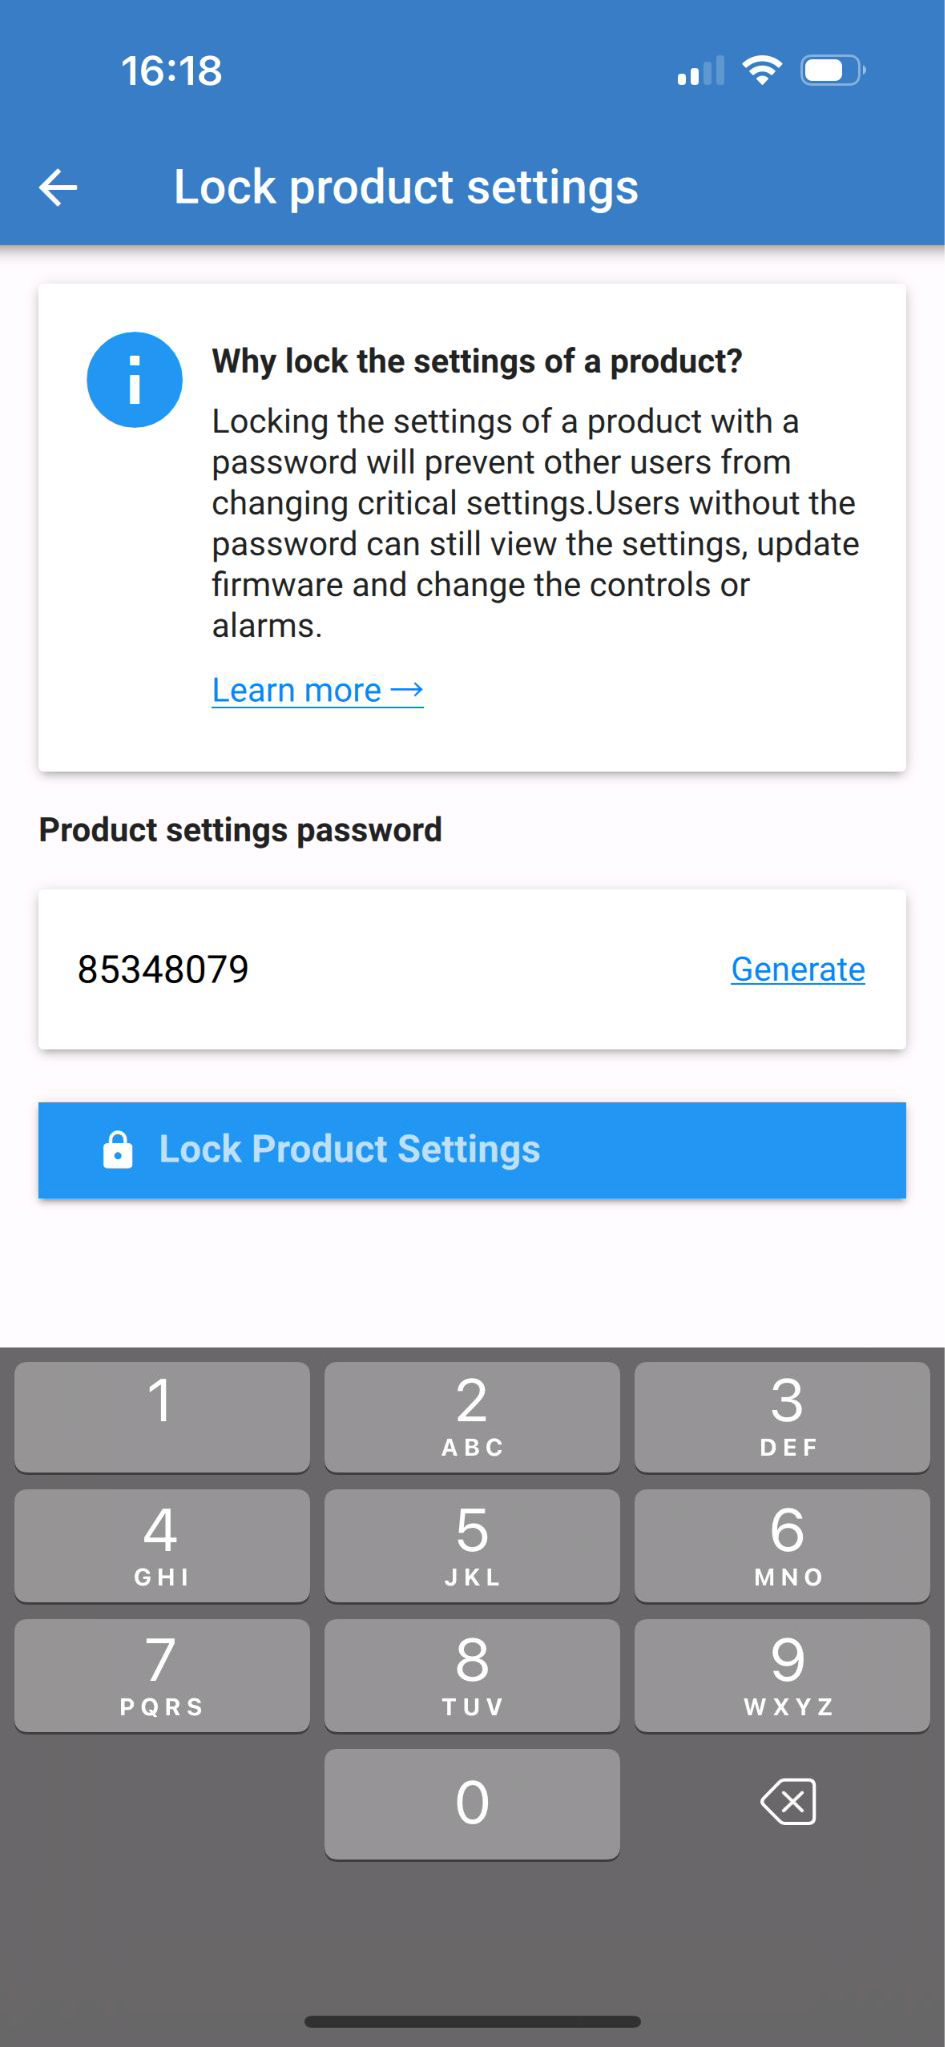
Choose a settings lock password.
If you tap the "Generate" button, a random password will be created. TipTouch and hold the password if you want to copy it for use on other products in the system. NoteDon't use the same password across different installations. The password is automatically stored on the phone and in your VRM user account, so there's no need to worry about losing the phone or tablet.
|
|
|
|
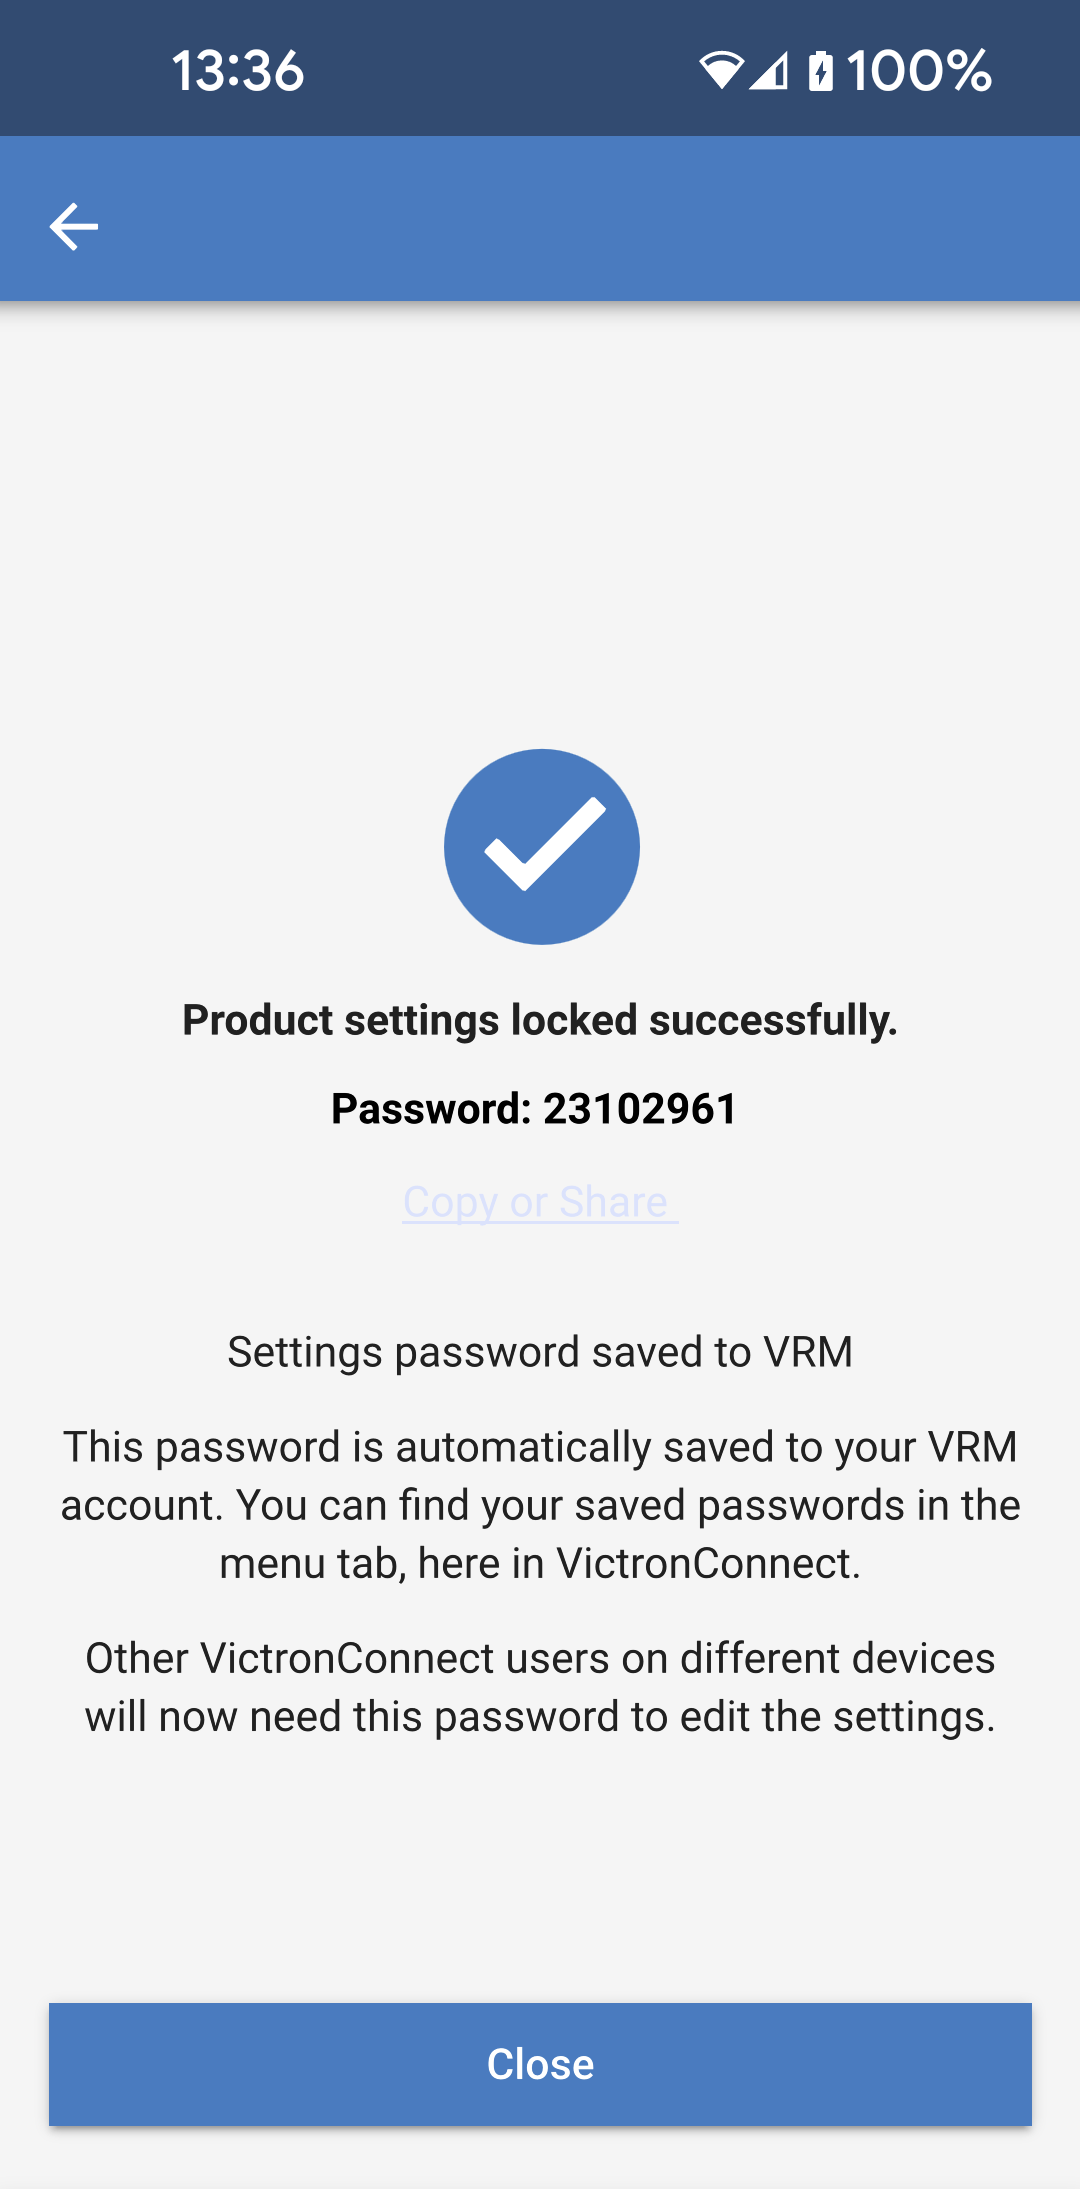
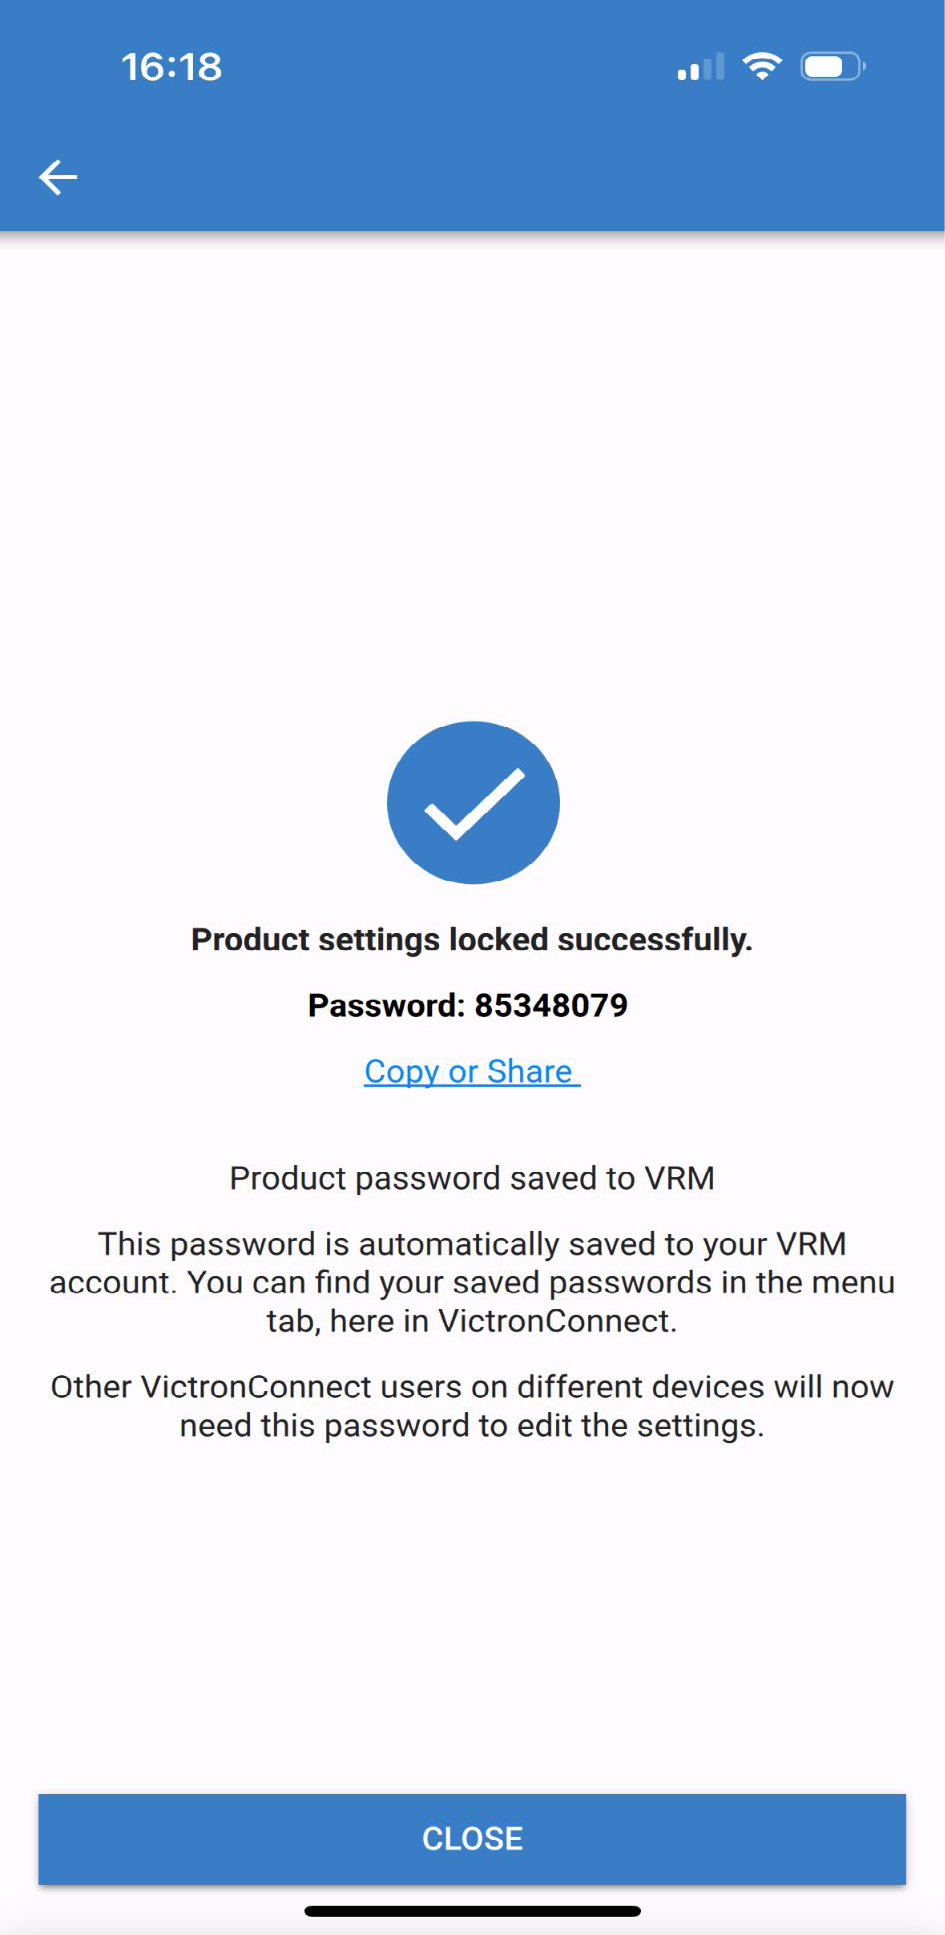
Now the product lock has been applied. The password is shown for you to make a note of it.
|
|
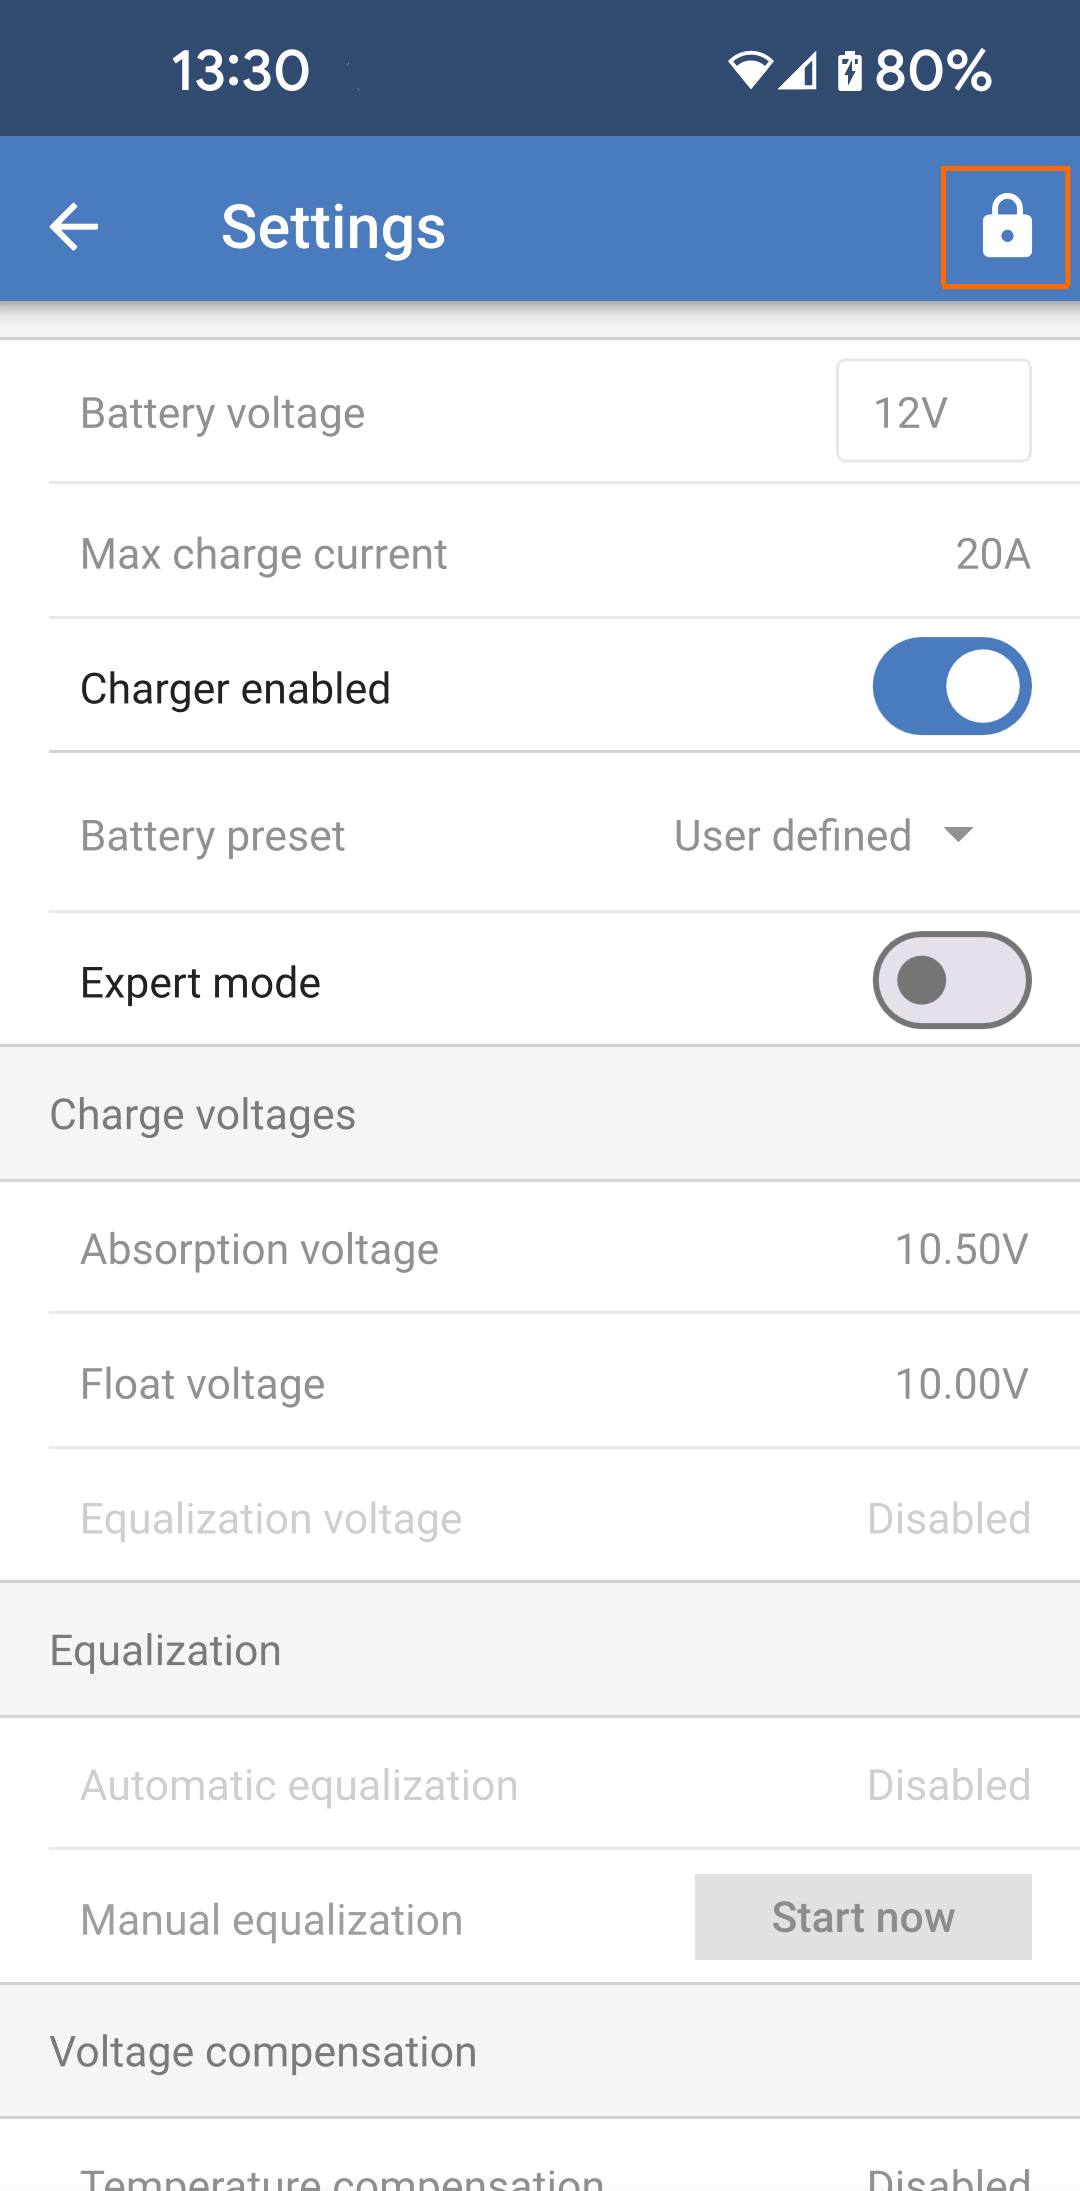
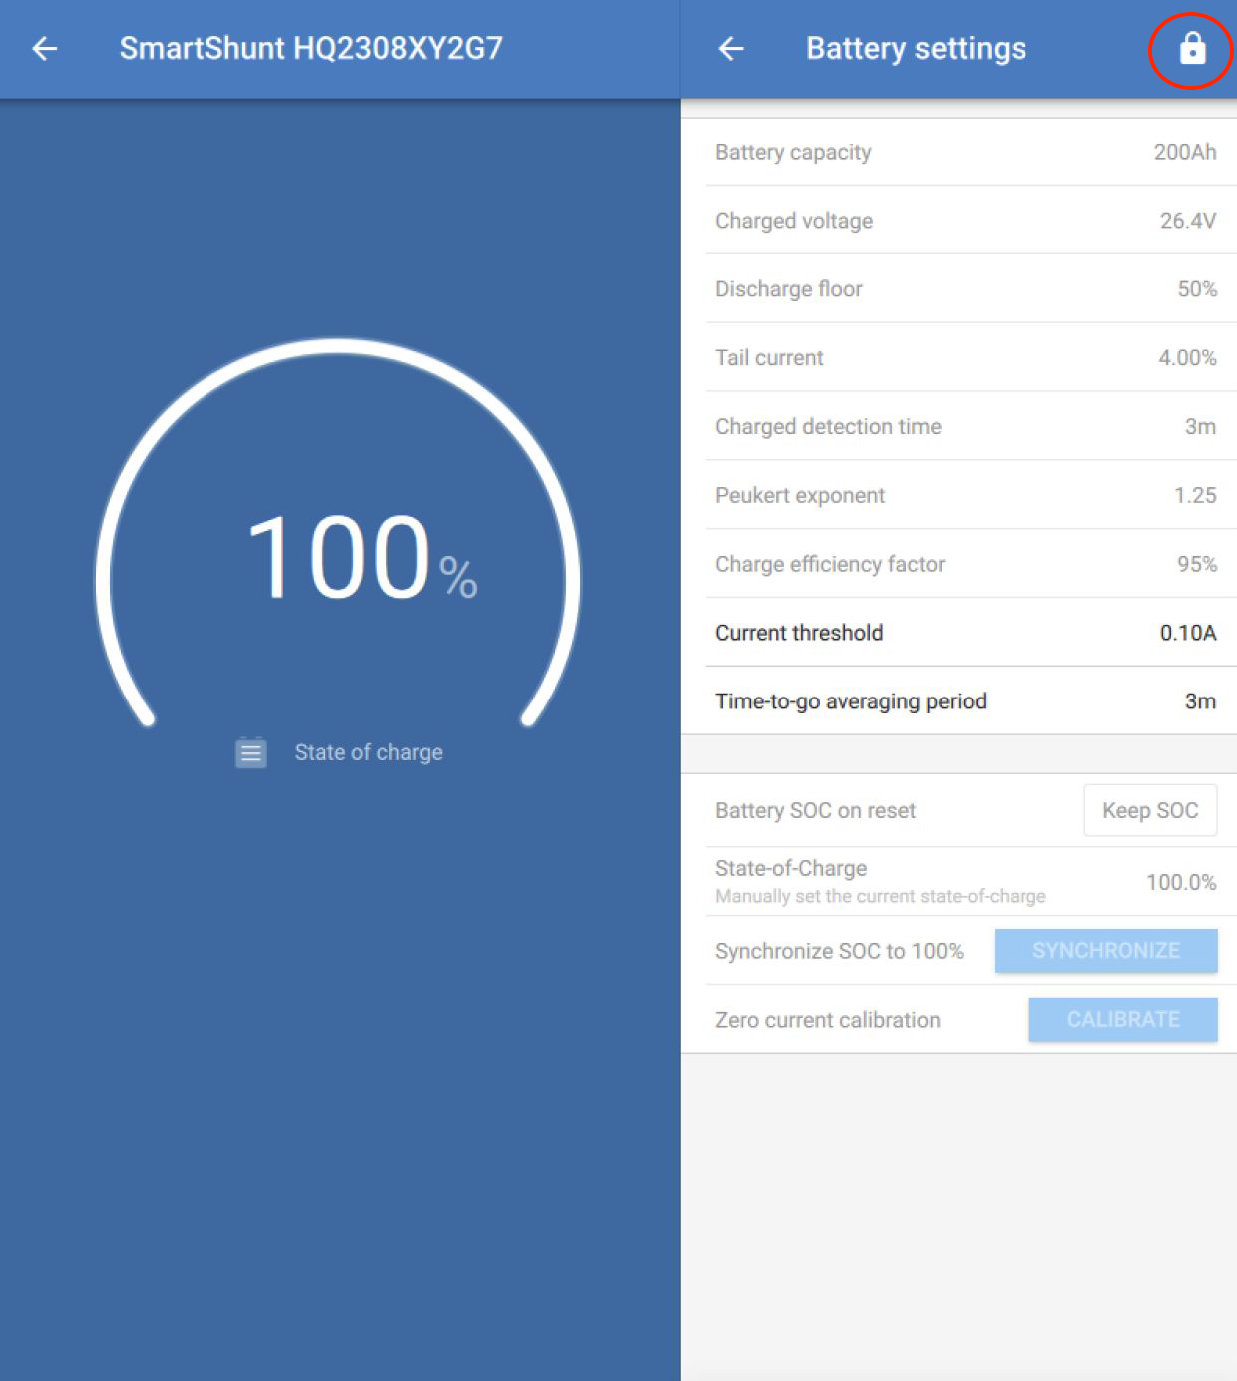
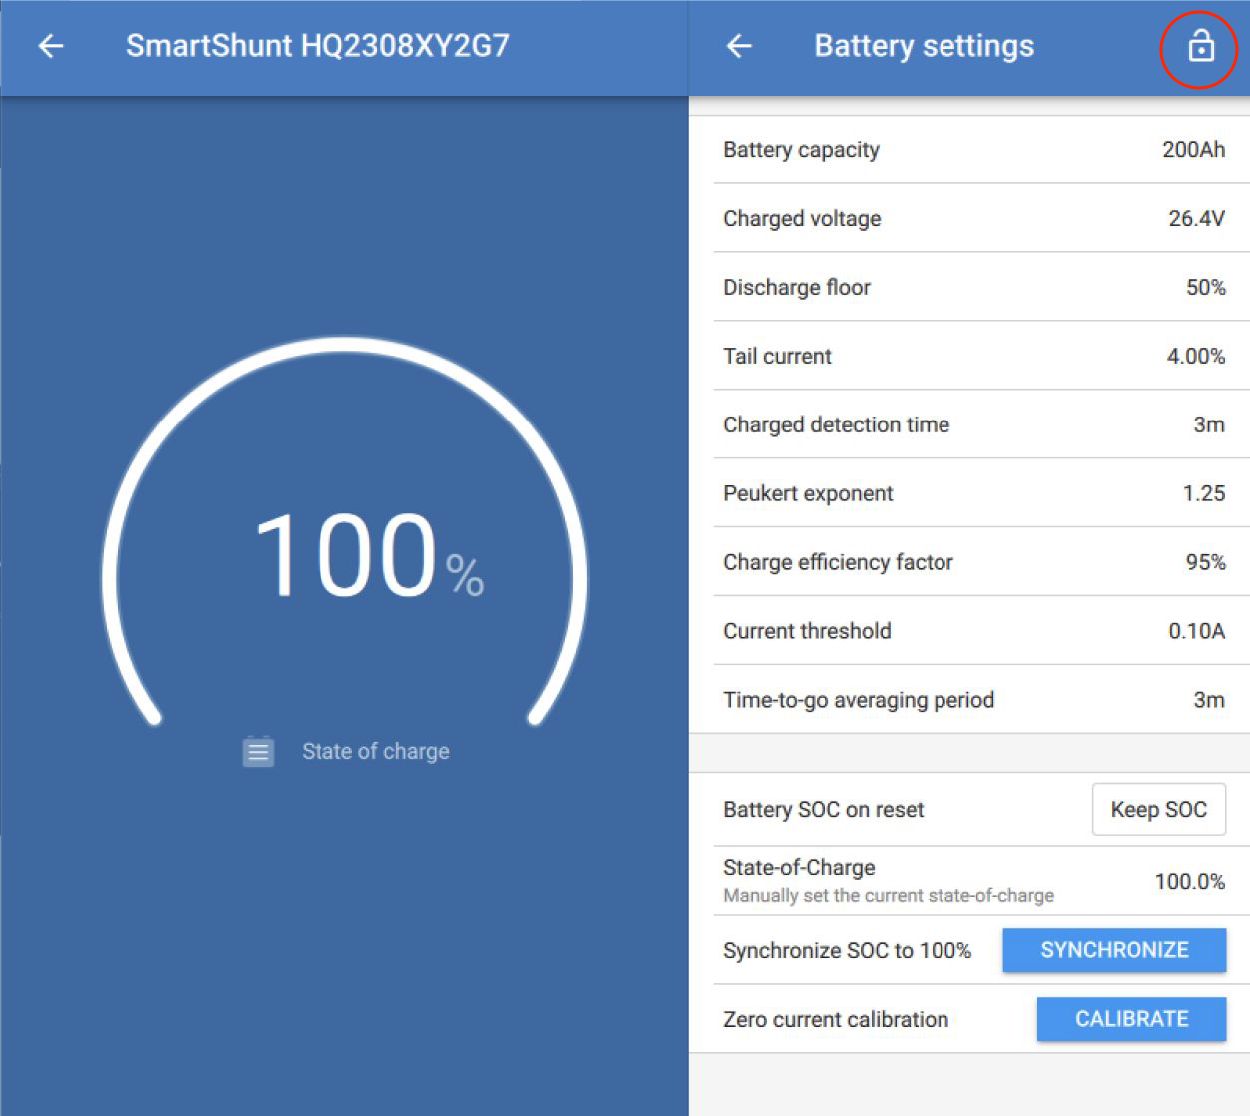
A lock icon in the top right of any settings page indicates that some settings are locked and cannot be changed. The greyed-out settings are locked and cannot be changed. |
|
Step 1 - Go to the lock feature
|
|
Step 2 - Choose the password
When you click 'Generate', VictronConnect will suggest a random password. Alternatively, you can enter your own code. Tips:
|
|
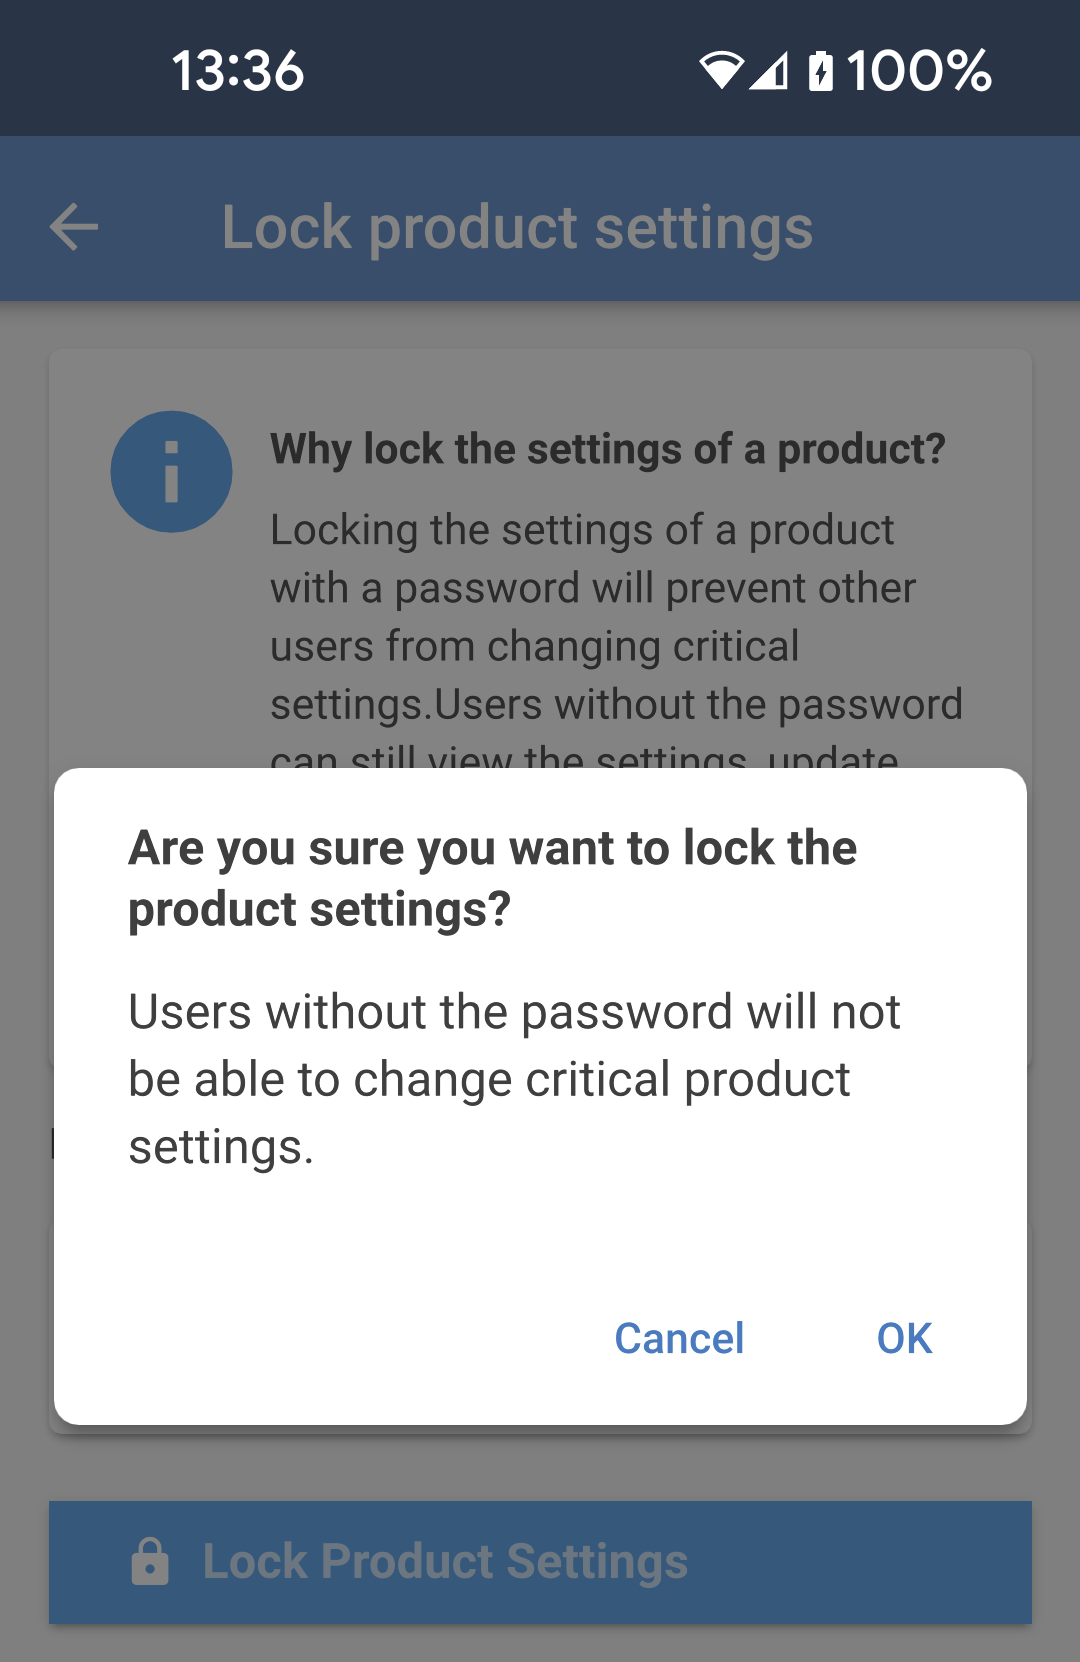
Step 3 - Confirmation screen
|
|
Step 4 - Seeing the settings menu
|
|
12.4.3. How to unlock
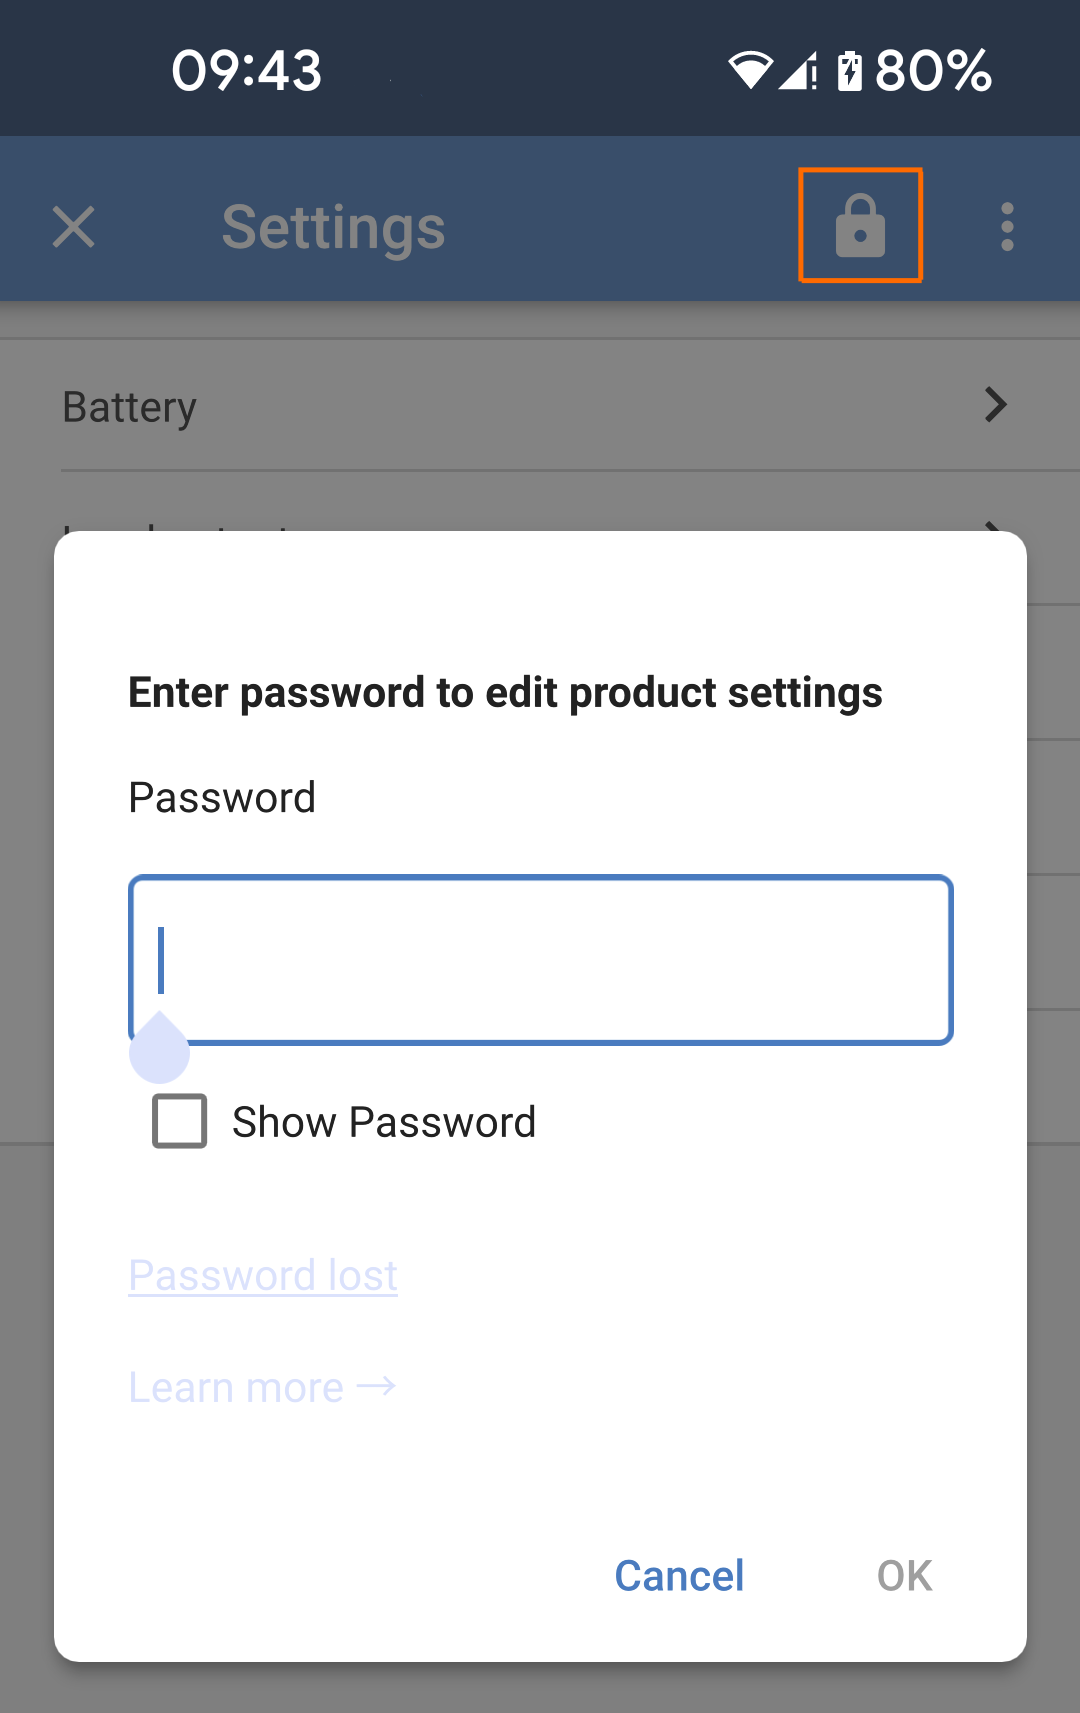
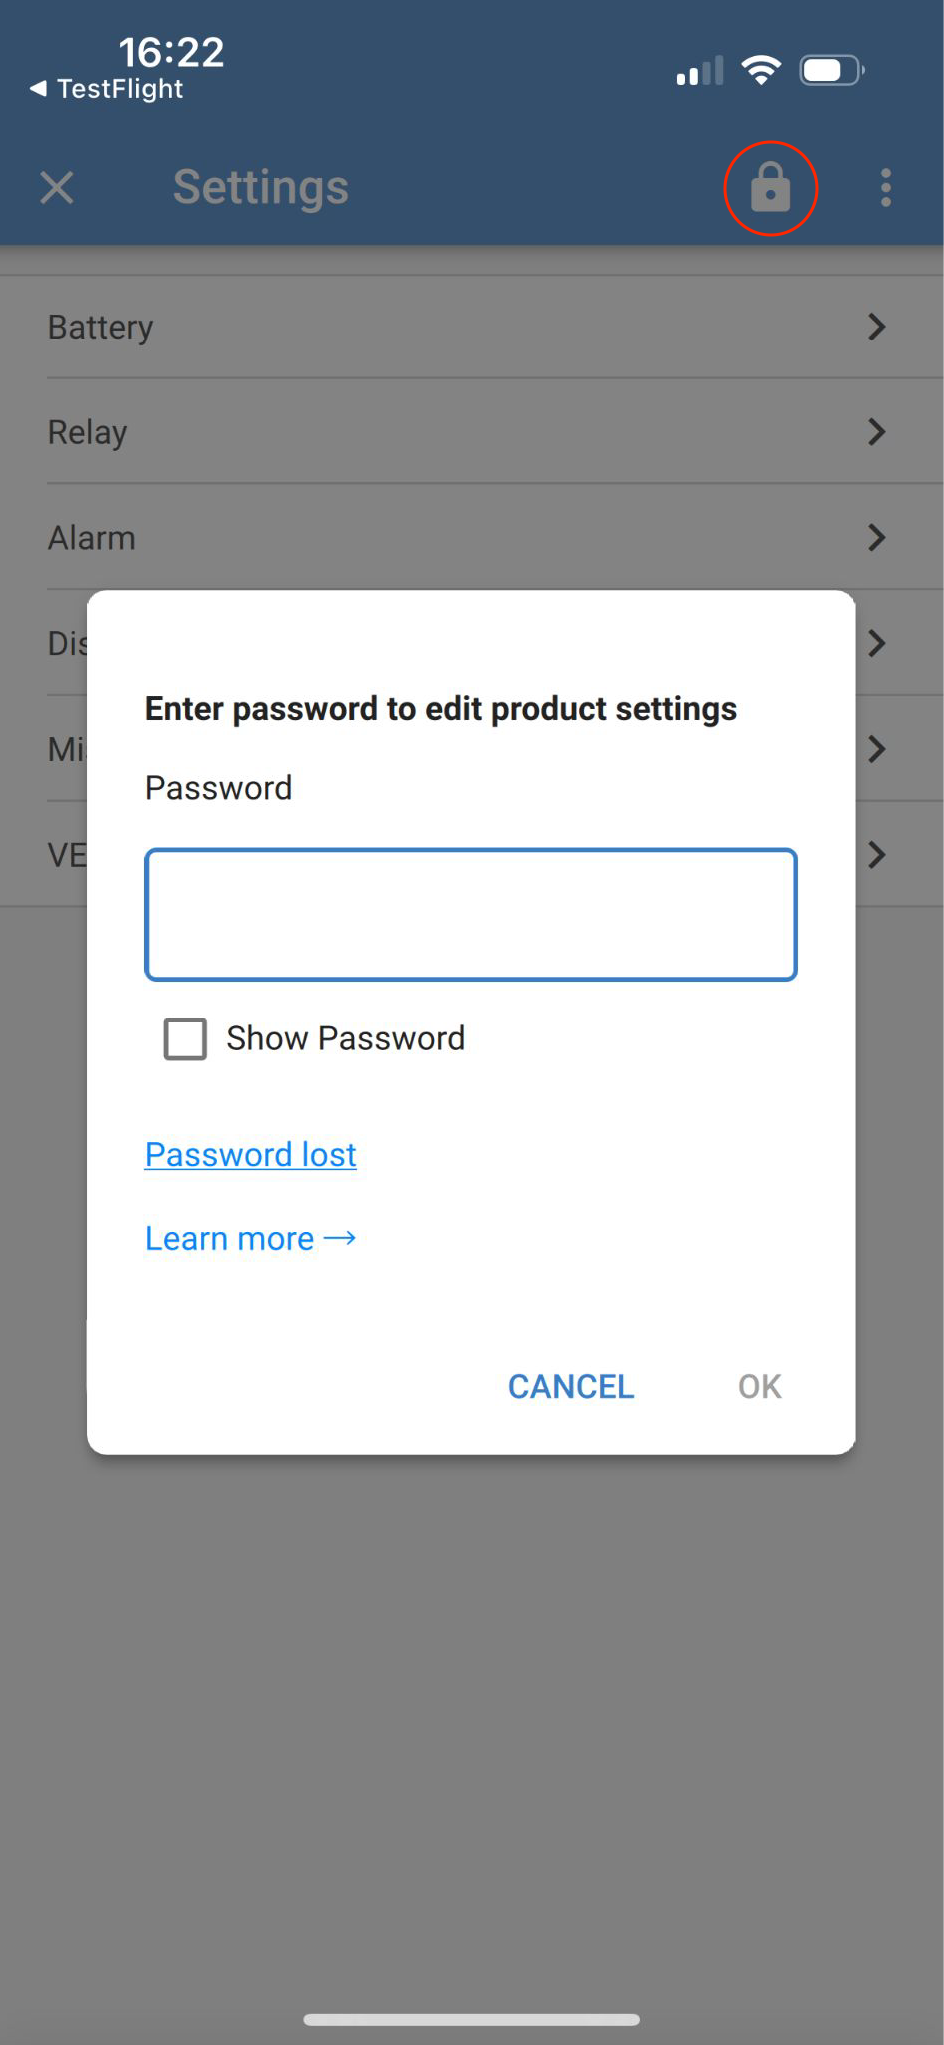
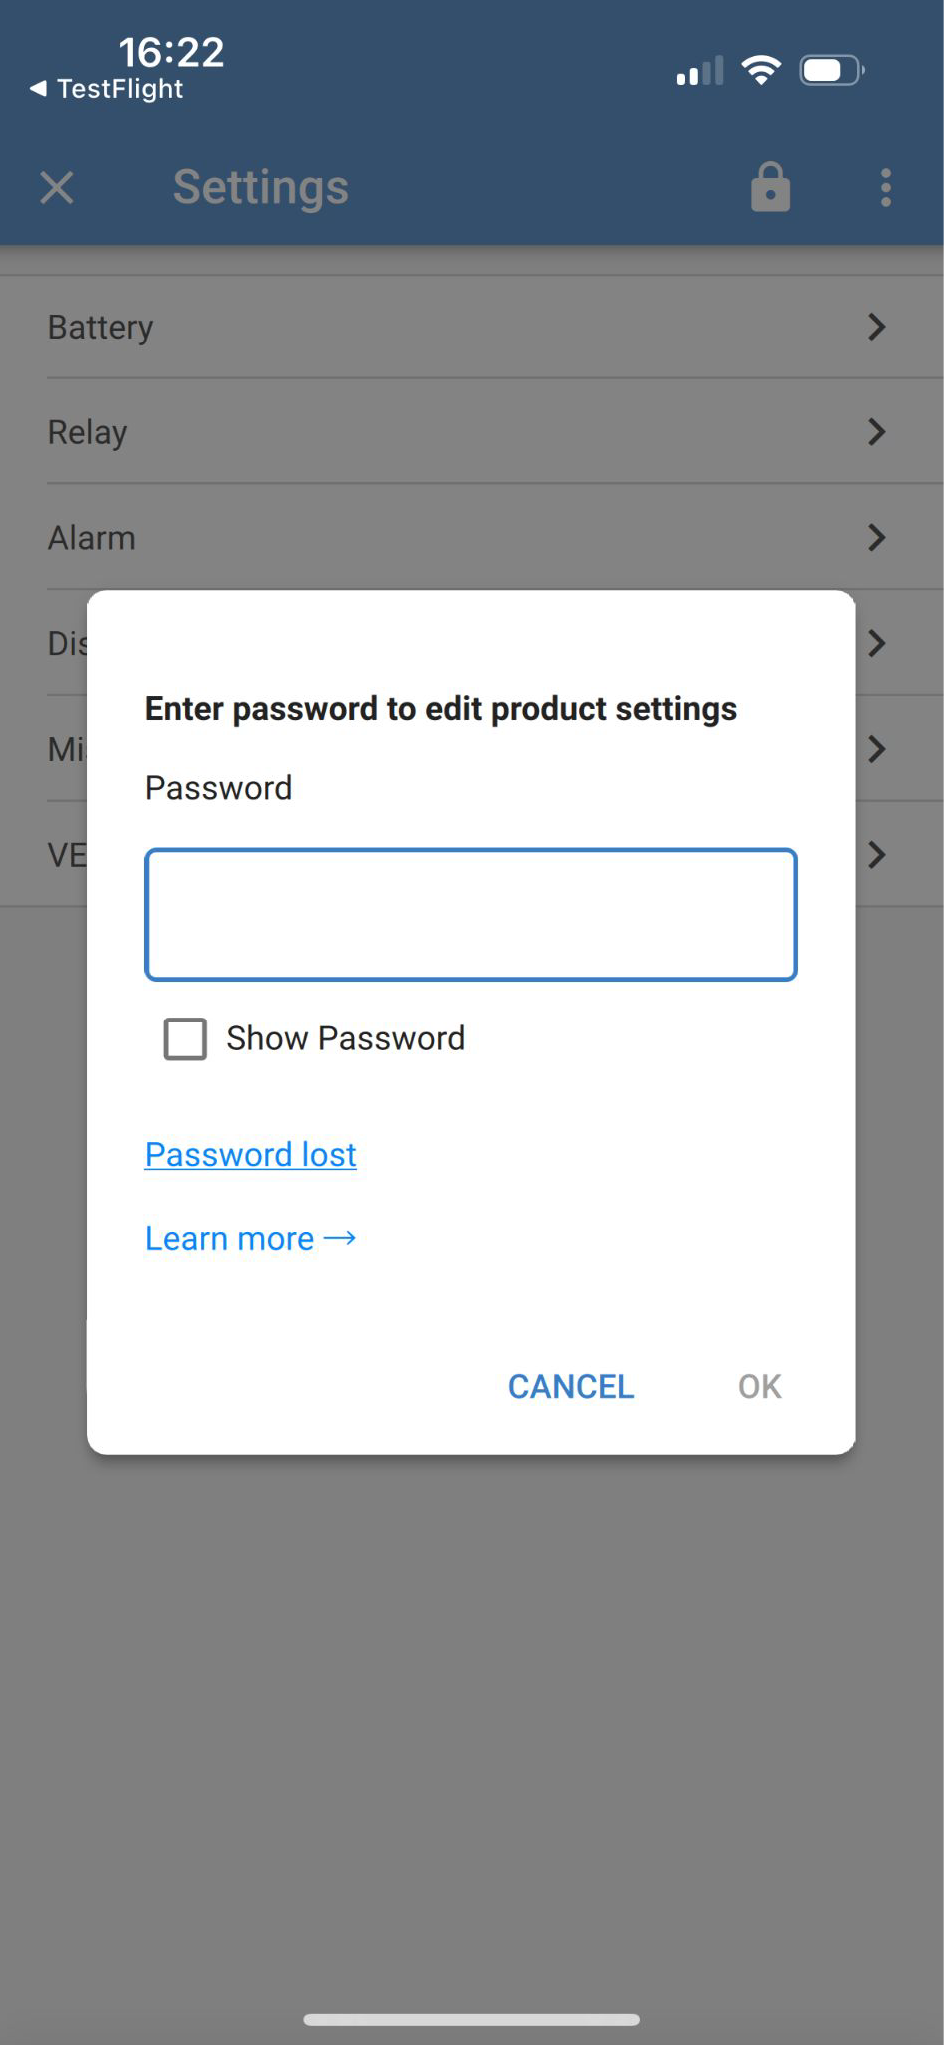
You can gain access to the product settings by using the specific password for it.
Once the password is entered in VictronConnect, it is stored on the phone and VRM, and it does not need to be entered again on any device that is logged into the VRM account. The product remains locked for users attempting to make changes from other devices.
When attempting to access all settings on a locked product, you'll see a locked icon in the top right of the settings pages.
|
|
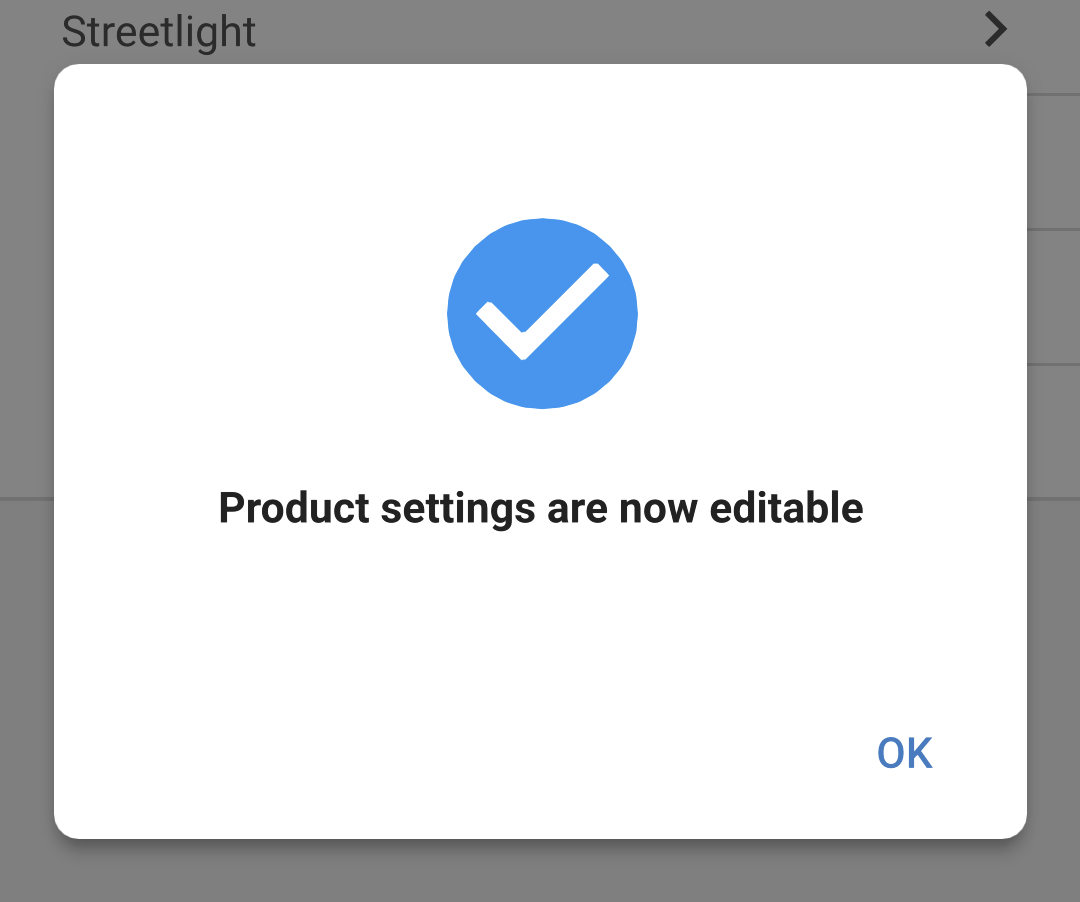
A pop will confirm that the settings can now be edited.
NoteAlthough access has been granted to change settings on the connected product, the settings lock is still in place. |
|
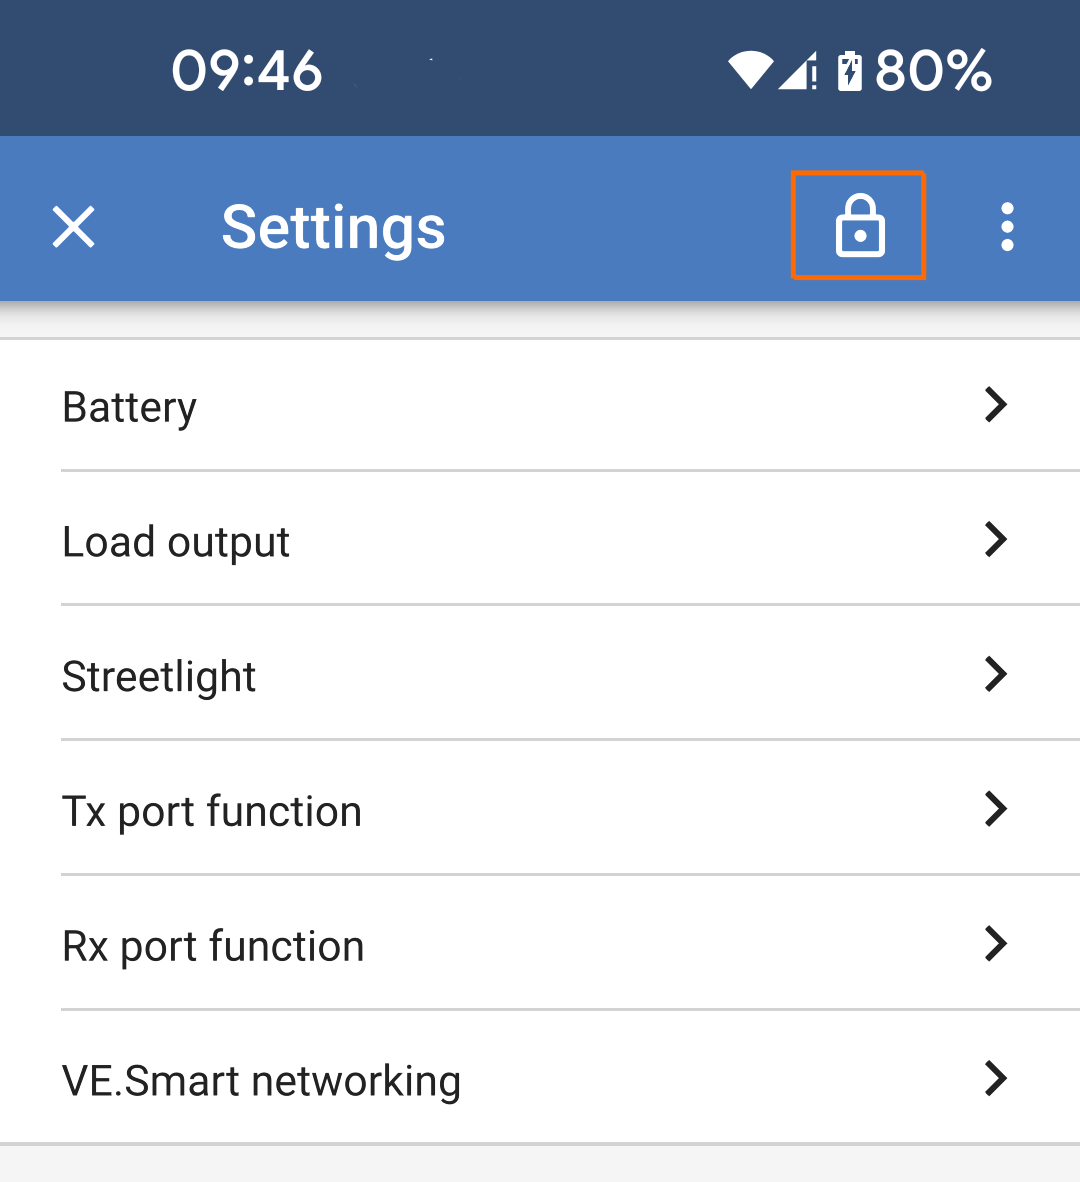
The lock icon is now unlocked, indicating that the settings can be changed. |
|
Step 1 - Obtaining access
|
|
Step 2 - Access granted
|
|
12.4.4. How to remove the settings lock
The product settings lock can be removed from a product if no longer needed by the installer, or via the password lost flow by the end user.
The password can be removed using the product PUK code or via a VE.Direct cable.
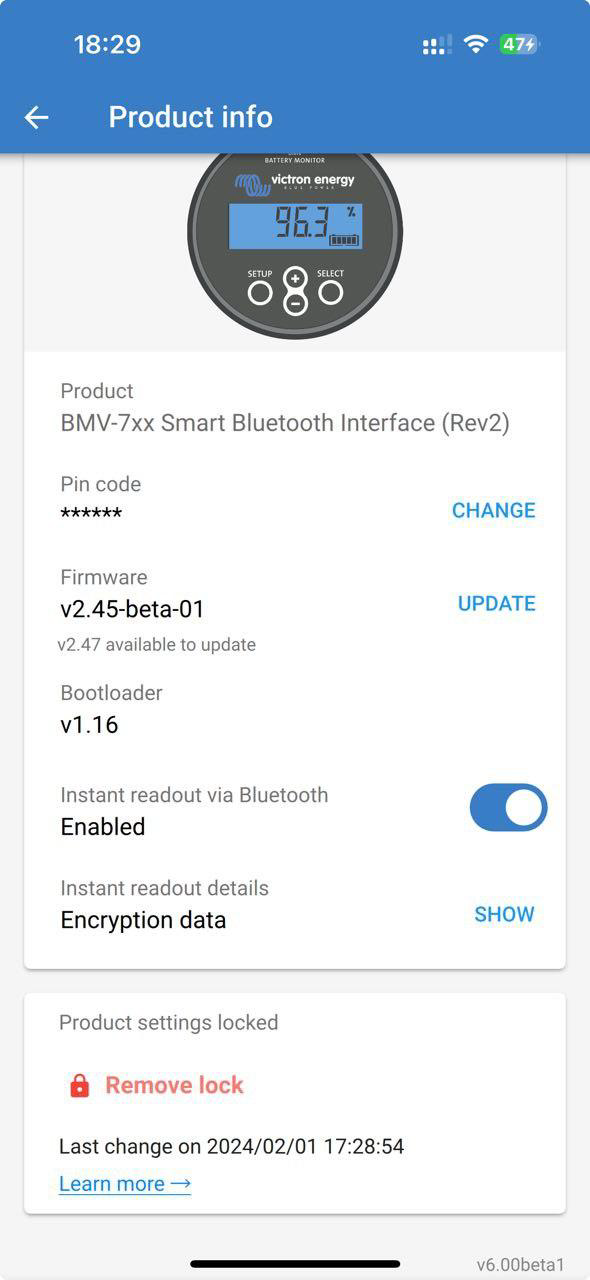
The settings lock can be removed from the product from the product info page.
|
|
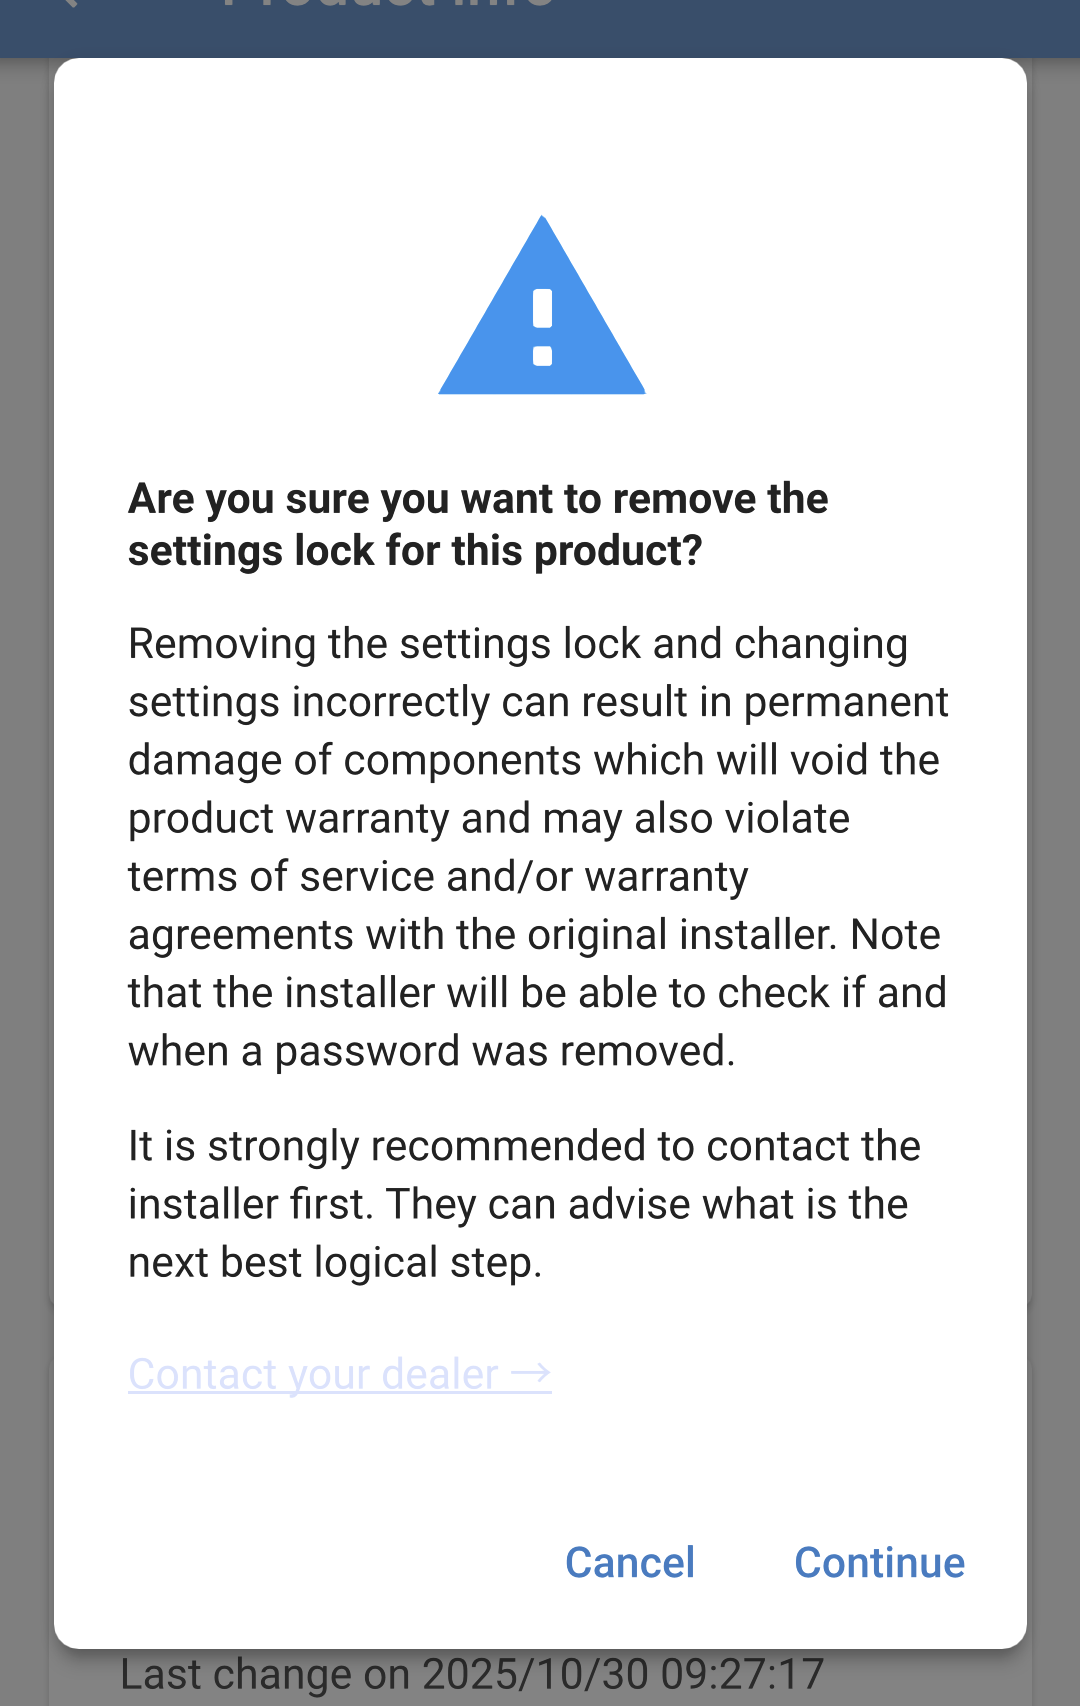
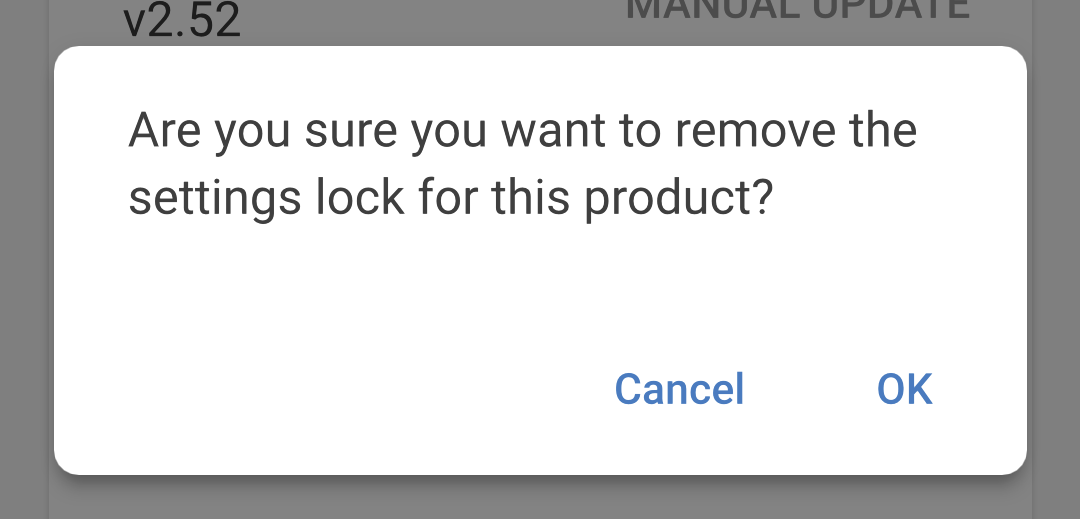
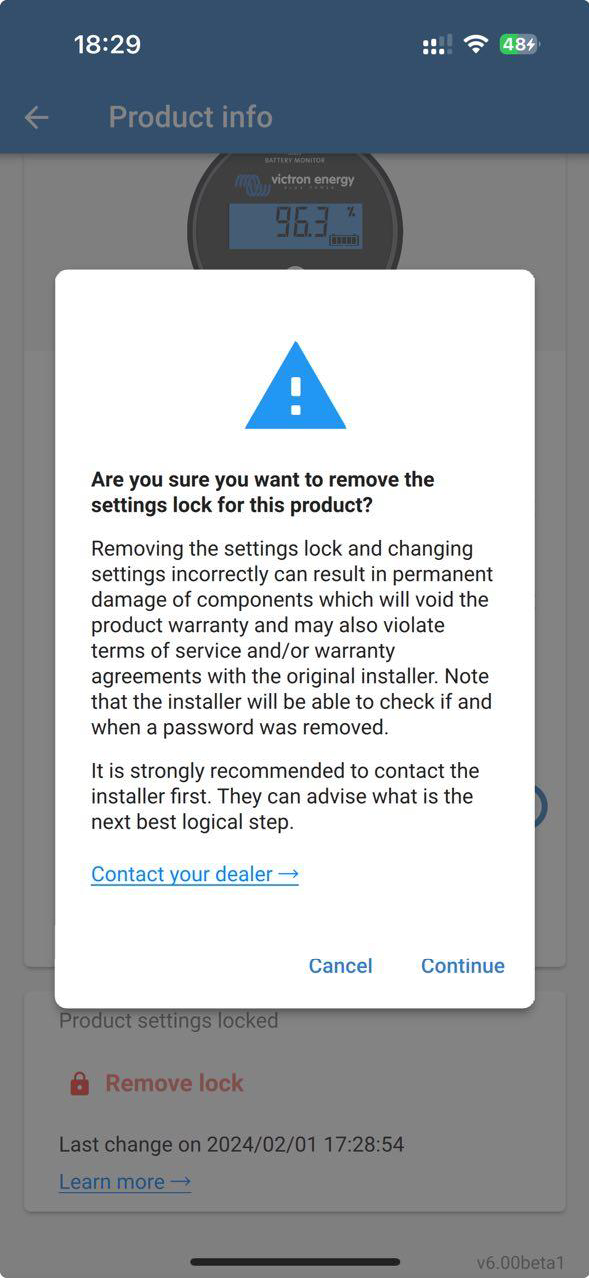
A warning message will pop up with reasons not to remove the settings lock and advice to contact the installer first. There is a link at the bottom of the popup providing steps to contact your installer.
|
|
TipYou can use the "Password lost" link to follow the steps for unlocking using a VE.Direct cable or PUK. |
|
|
|
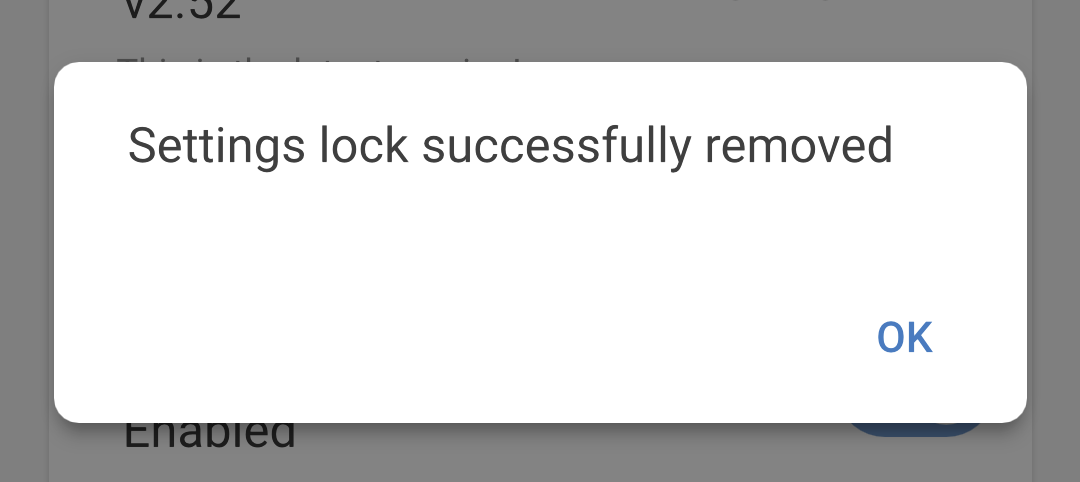
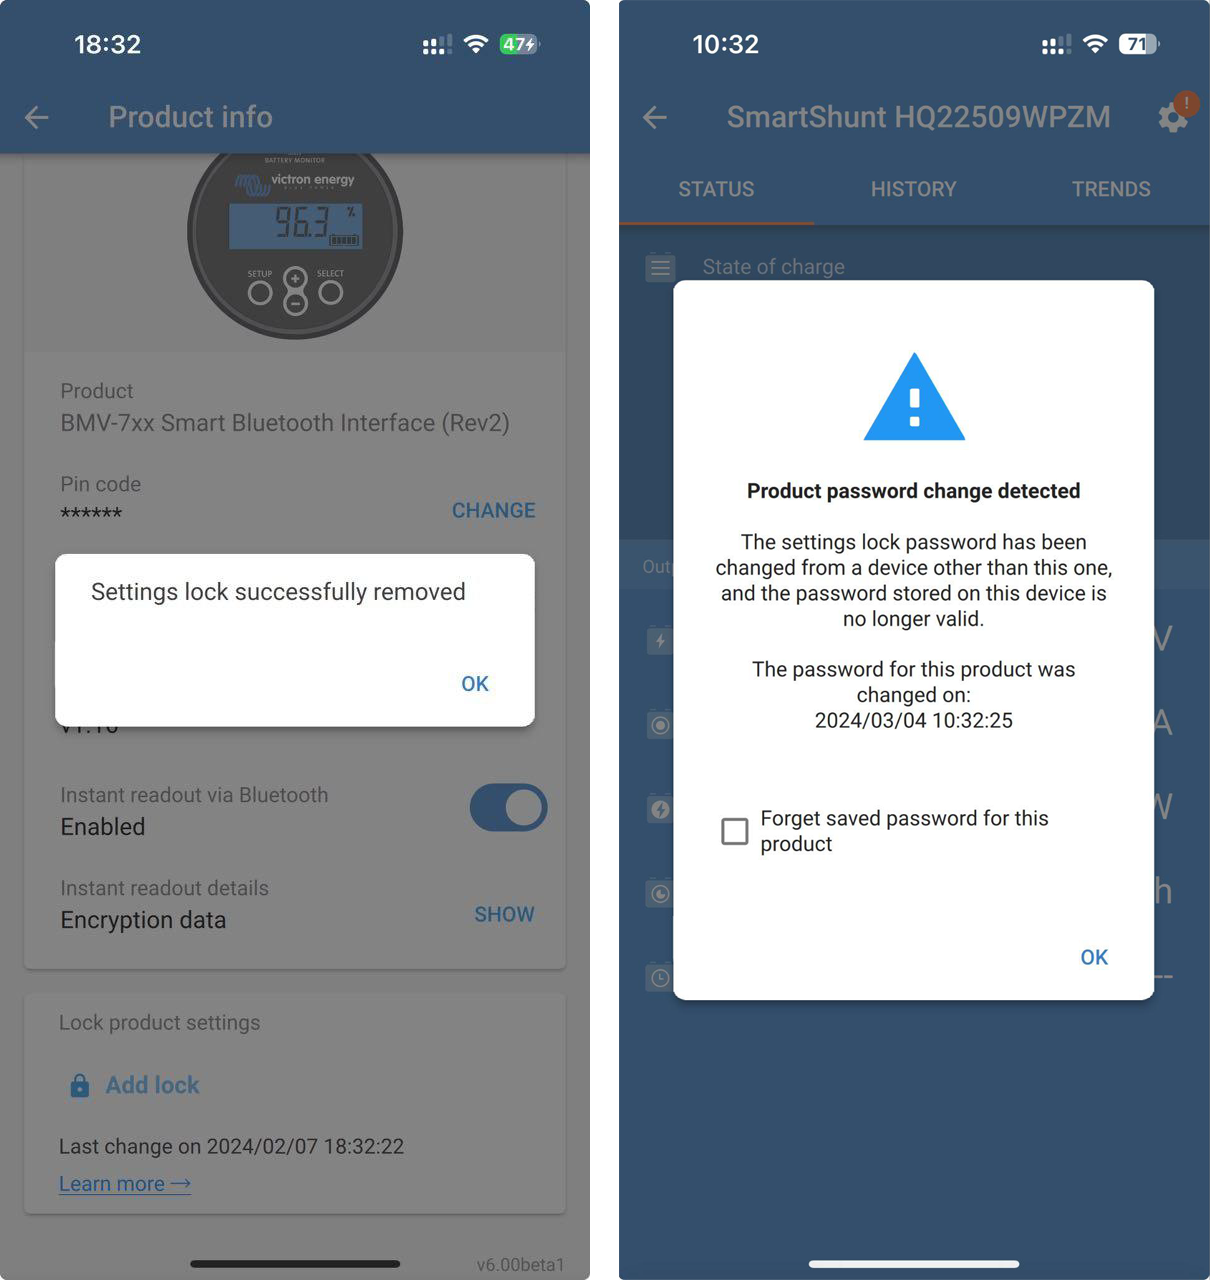
Now the settings lock has been removed.
|
|
The next time the installer reconnects to the product, they'll receive a notification that the product lock status has been changed.
The popup warns the installer that the settings lock status has changed along with a timestamp.
|
|
Step 1 - Go to the Product info page
|
|
Step 2 - Acknowledge the warning
|
|
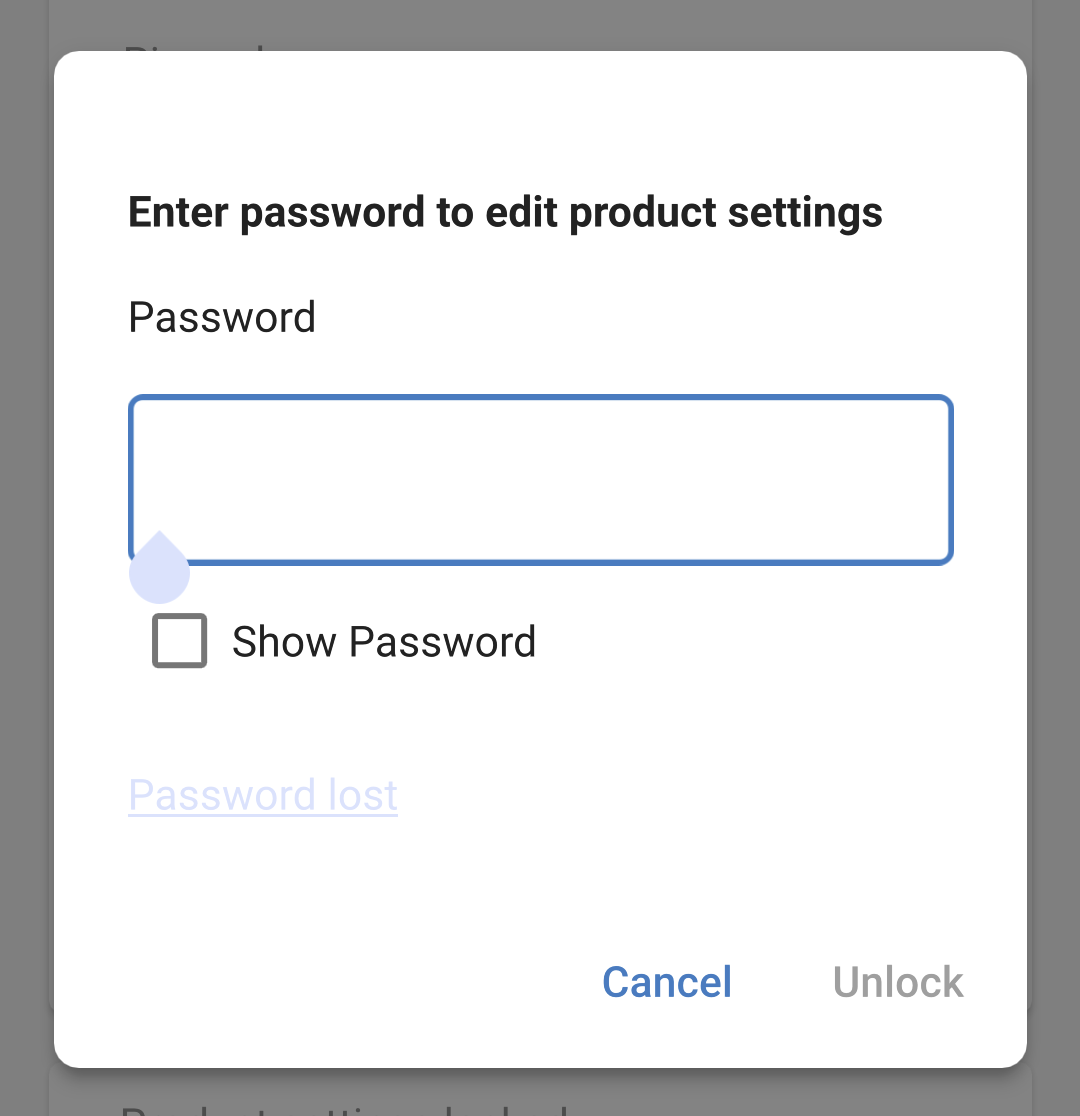
Step 3 - Enter the password
|
|
Step 4 - Confirmation
|
|
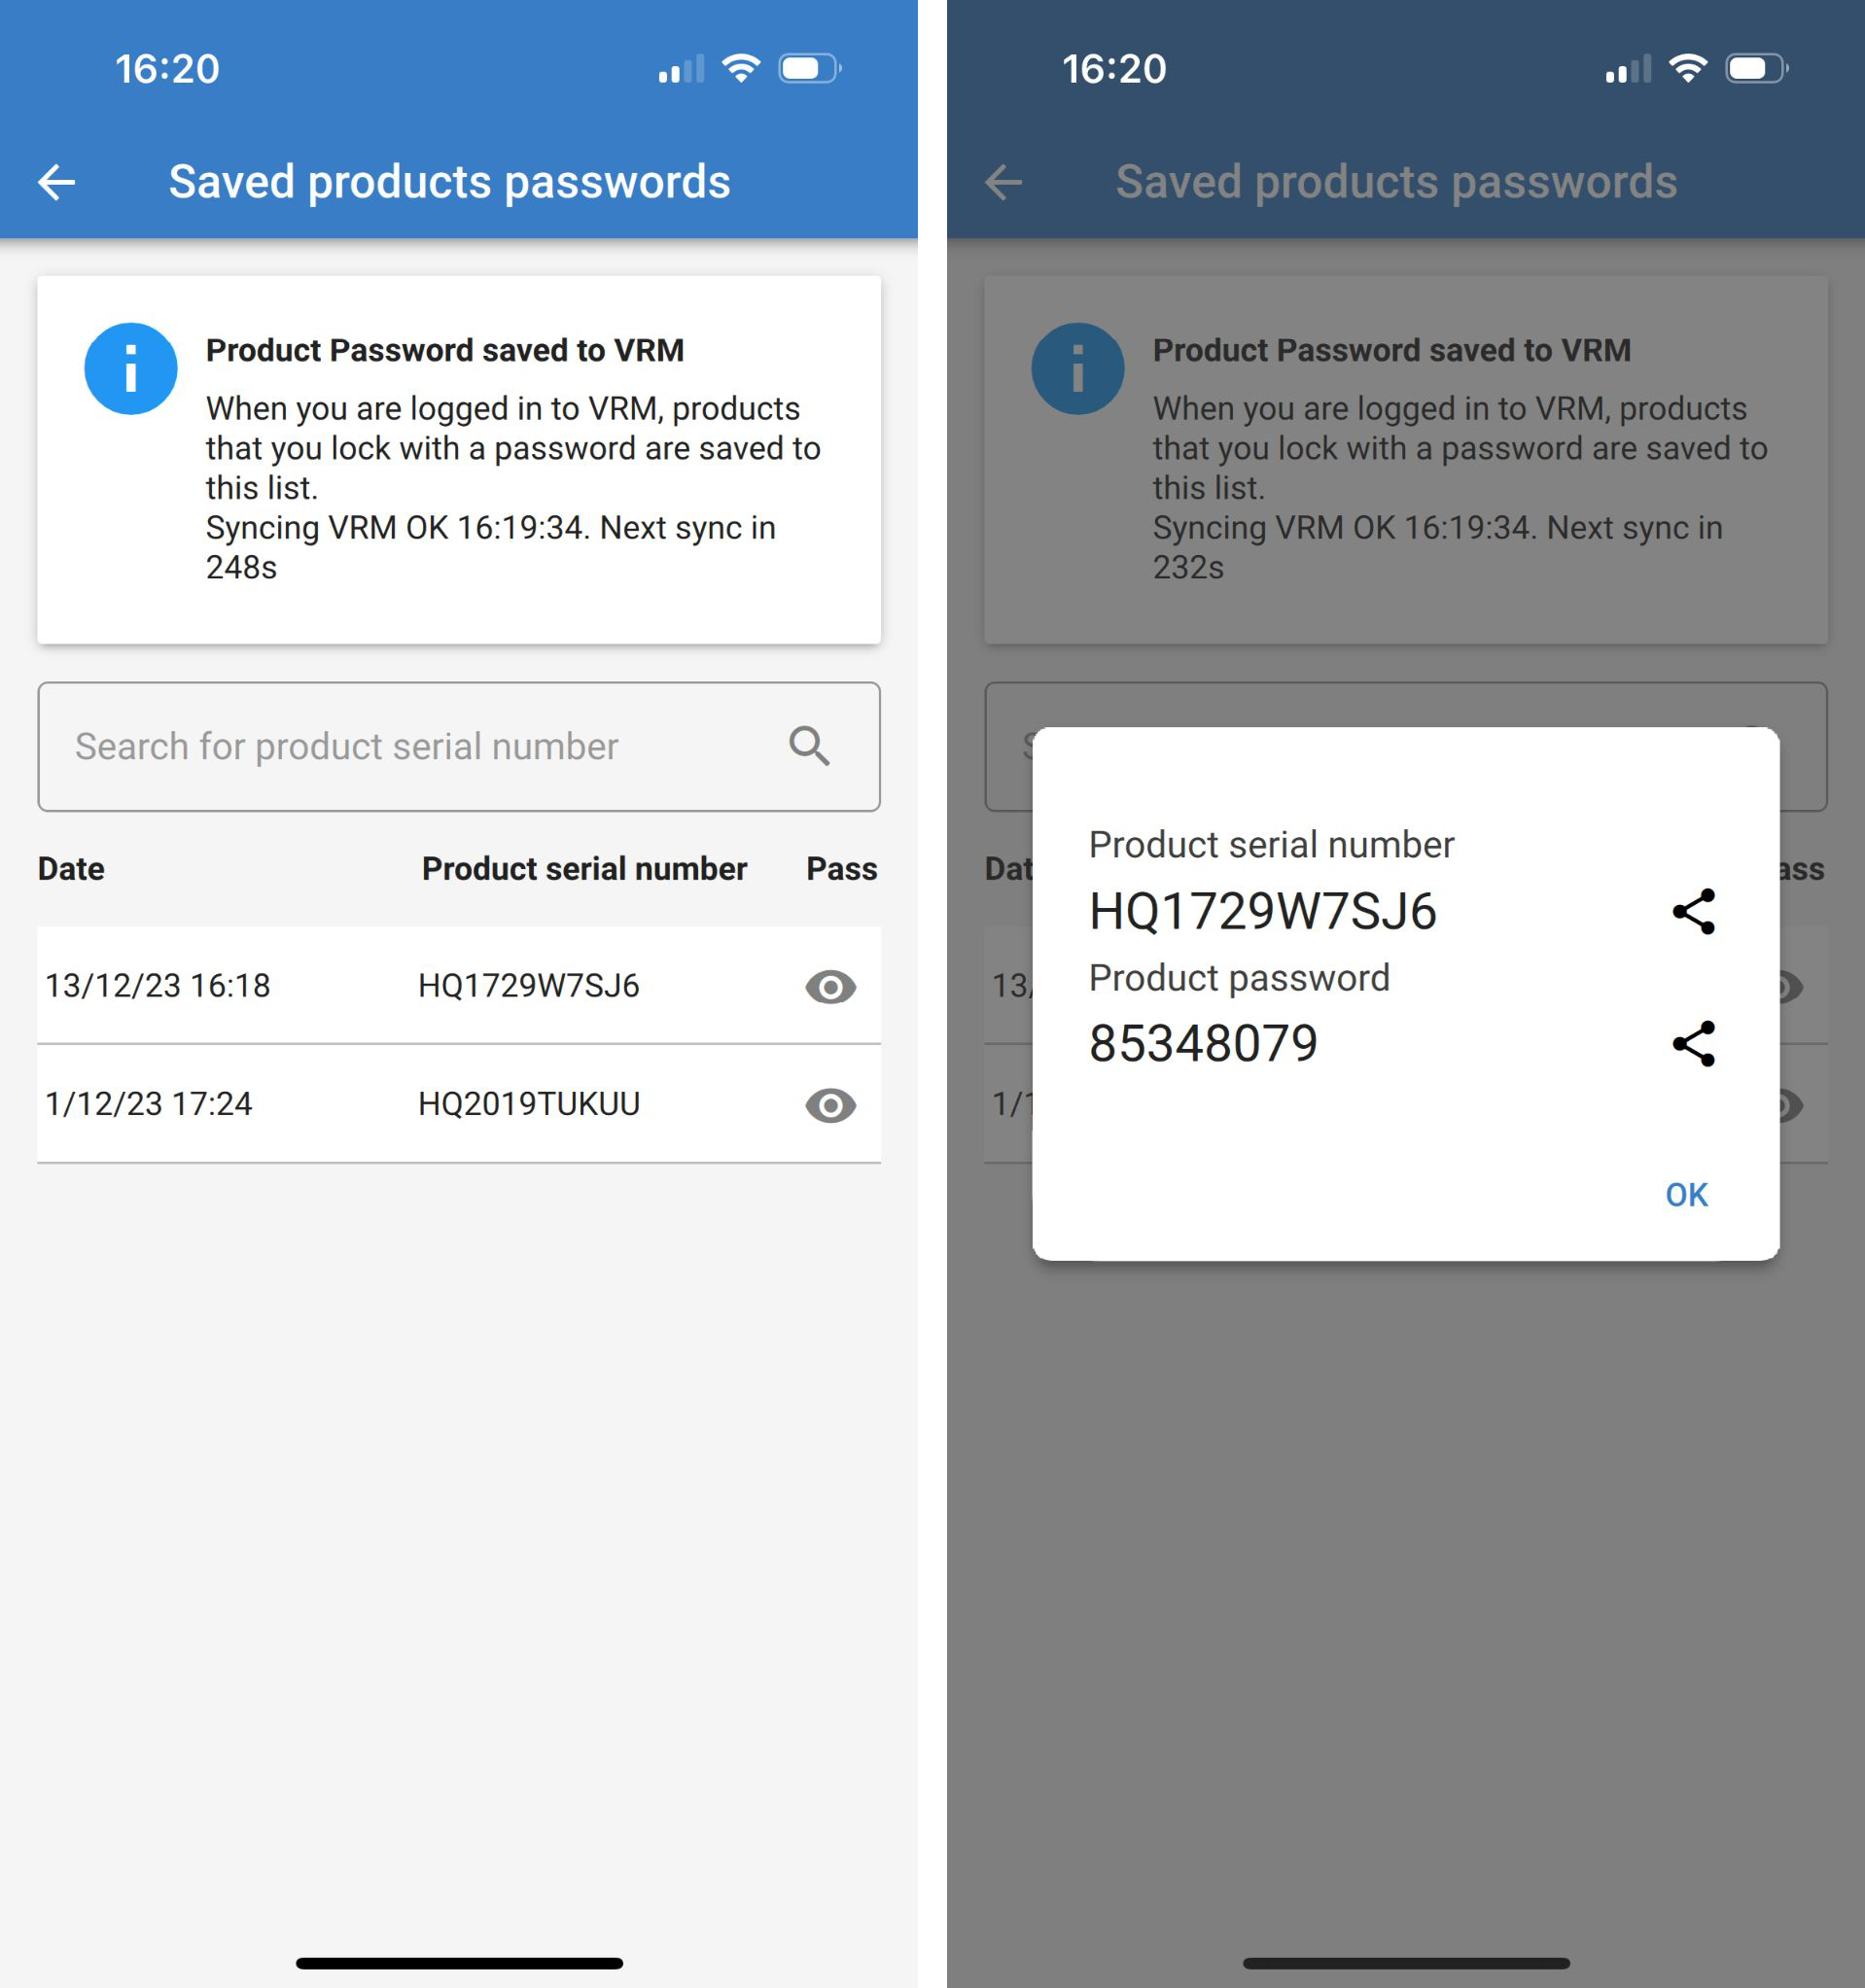
12.4.5. Built-in password manager
In the main VictronConnect menu, there is a new entry called 'Saved product passwords'. It shows all serial number/password combinations stored on the phone. When VictronConnect is logged into VRM, then these are automatically backed up to the VRM user account and synchronised with your other phones or tablets in case logged into the same VRM user account. Not connected to the internet while setting up a system? No problem - VictronConnect automatically stores them in the background and will regularly check if there is a connection. The sync status is displayed at the top of the page. View or search all saved passwords for your VRM account in one list. Easily see and copy the product password to send to colleagues or end-users. Only visible when logged into the installing VRM account. |
|
12.5. Q&A
Q: Can other installers receive passwords or edit rights on installations from the original installer?
A: Passwords or edit rights cannot be shared via the VRM account. Passwords can be viewed by the original installer in the ‘Saved product passwords’ section.